Agenda — Rooms & Sessions (Optional)
If you have planned sessions, lectures, or similar, in this step you enter the time, room, and other information related to the agenda. The agenda is organized by rooms — each room contains one or more sessions (talks, panels, workshops, etc.).
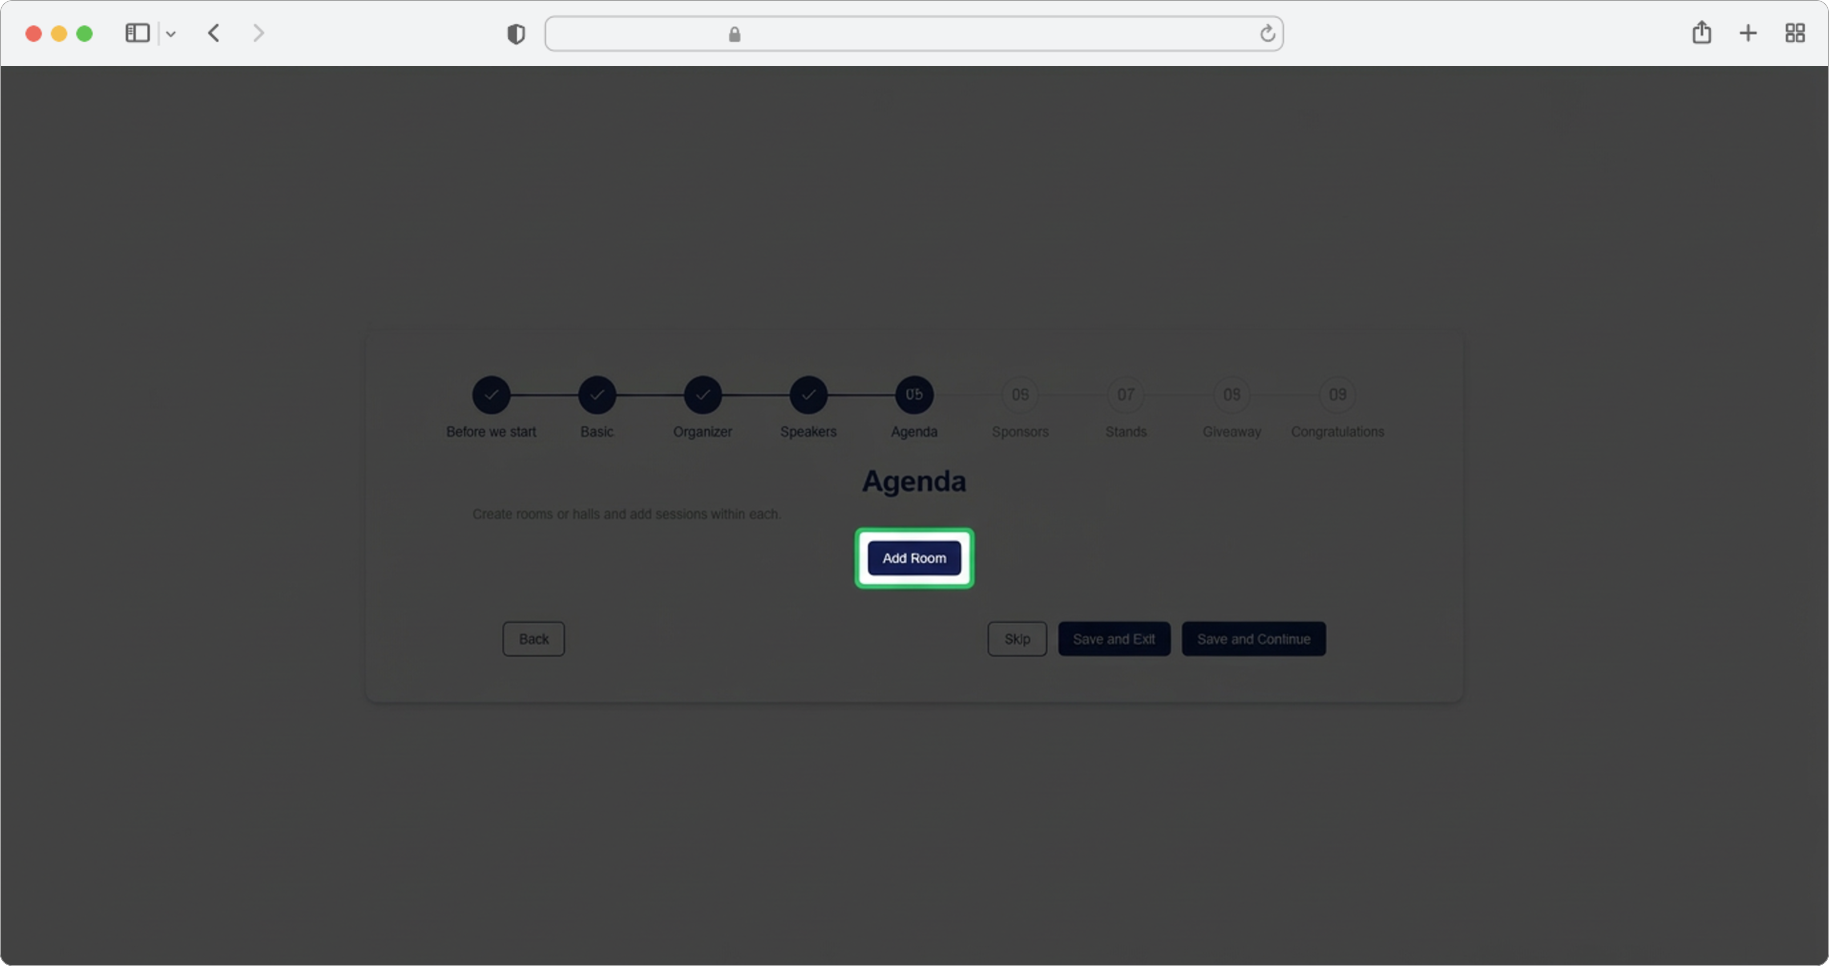
Add a Room
Click the "Add Room" button. A form for adding rooms and sessions held in that room will open. If you want to skip the step, select the "Skip" option, and if you want to finish creating, select the "Save and Exit" option.
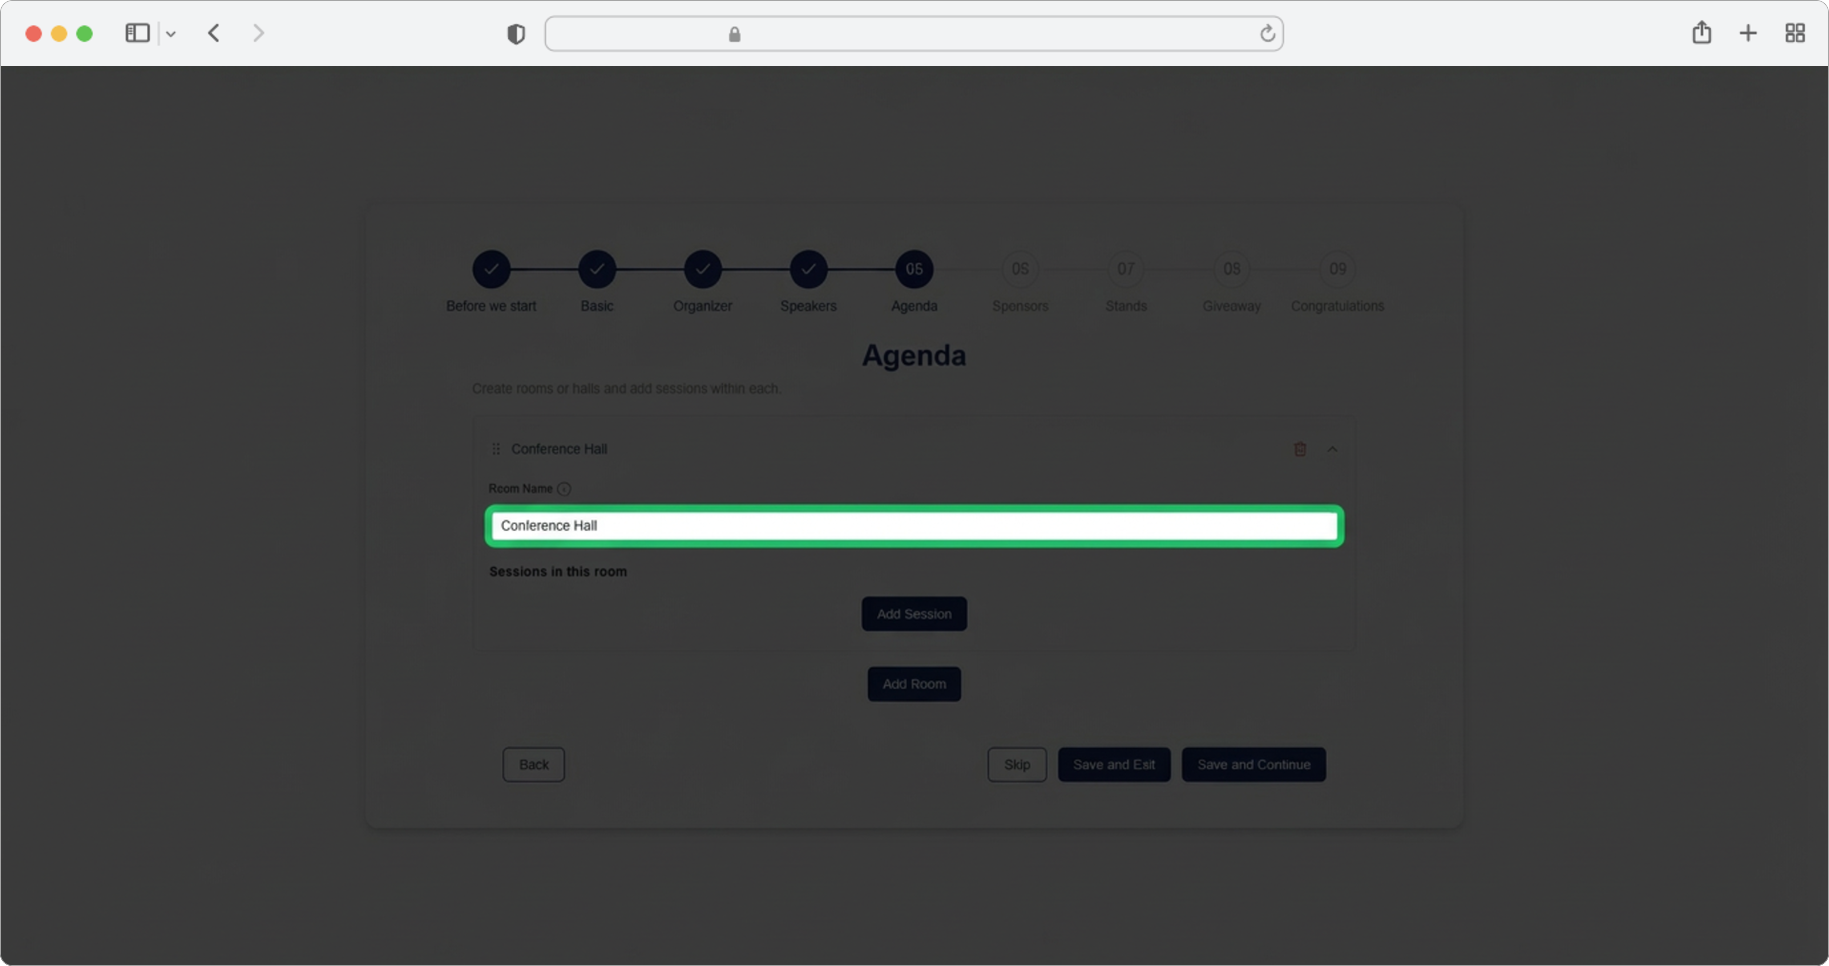
Room Name
Required field (if you chose to add an agenda). Click on the text input field labeled "Room name" and enter the room name (for example, "Main Hall", "Workshop Room A", "Auditorium").
Rooms without sessions will not be saved
Rooms that have a name but no sessions held in them will not be saved. Make sure to add at least one session to each room you create.
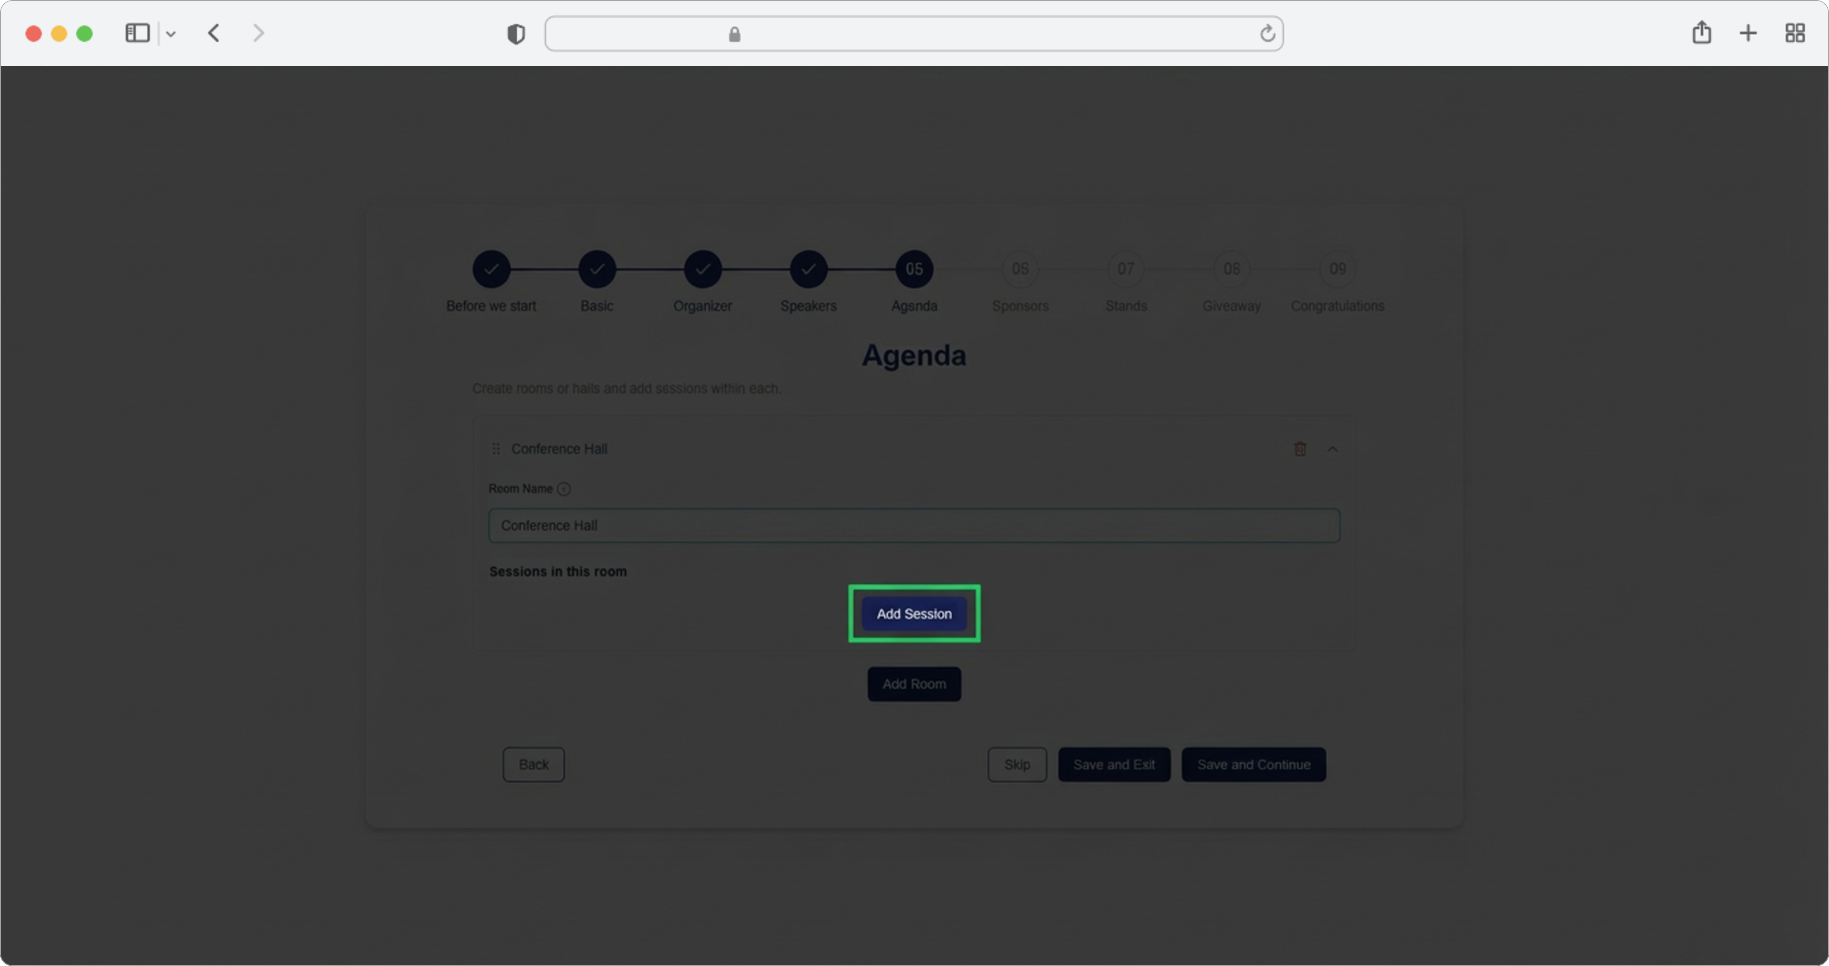
Add a Session
Required field (if you chose to add an agenda/room). Click the "Add Session" button to create a new session within this room.
Session Title
Required field (if you chose to add a session). Click on the text input field labeled "Session title" and enter the session name (for example, "Opening Keynote", "Panel: Future of AI", "Coffee Break").
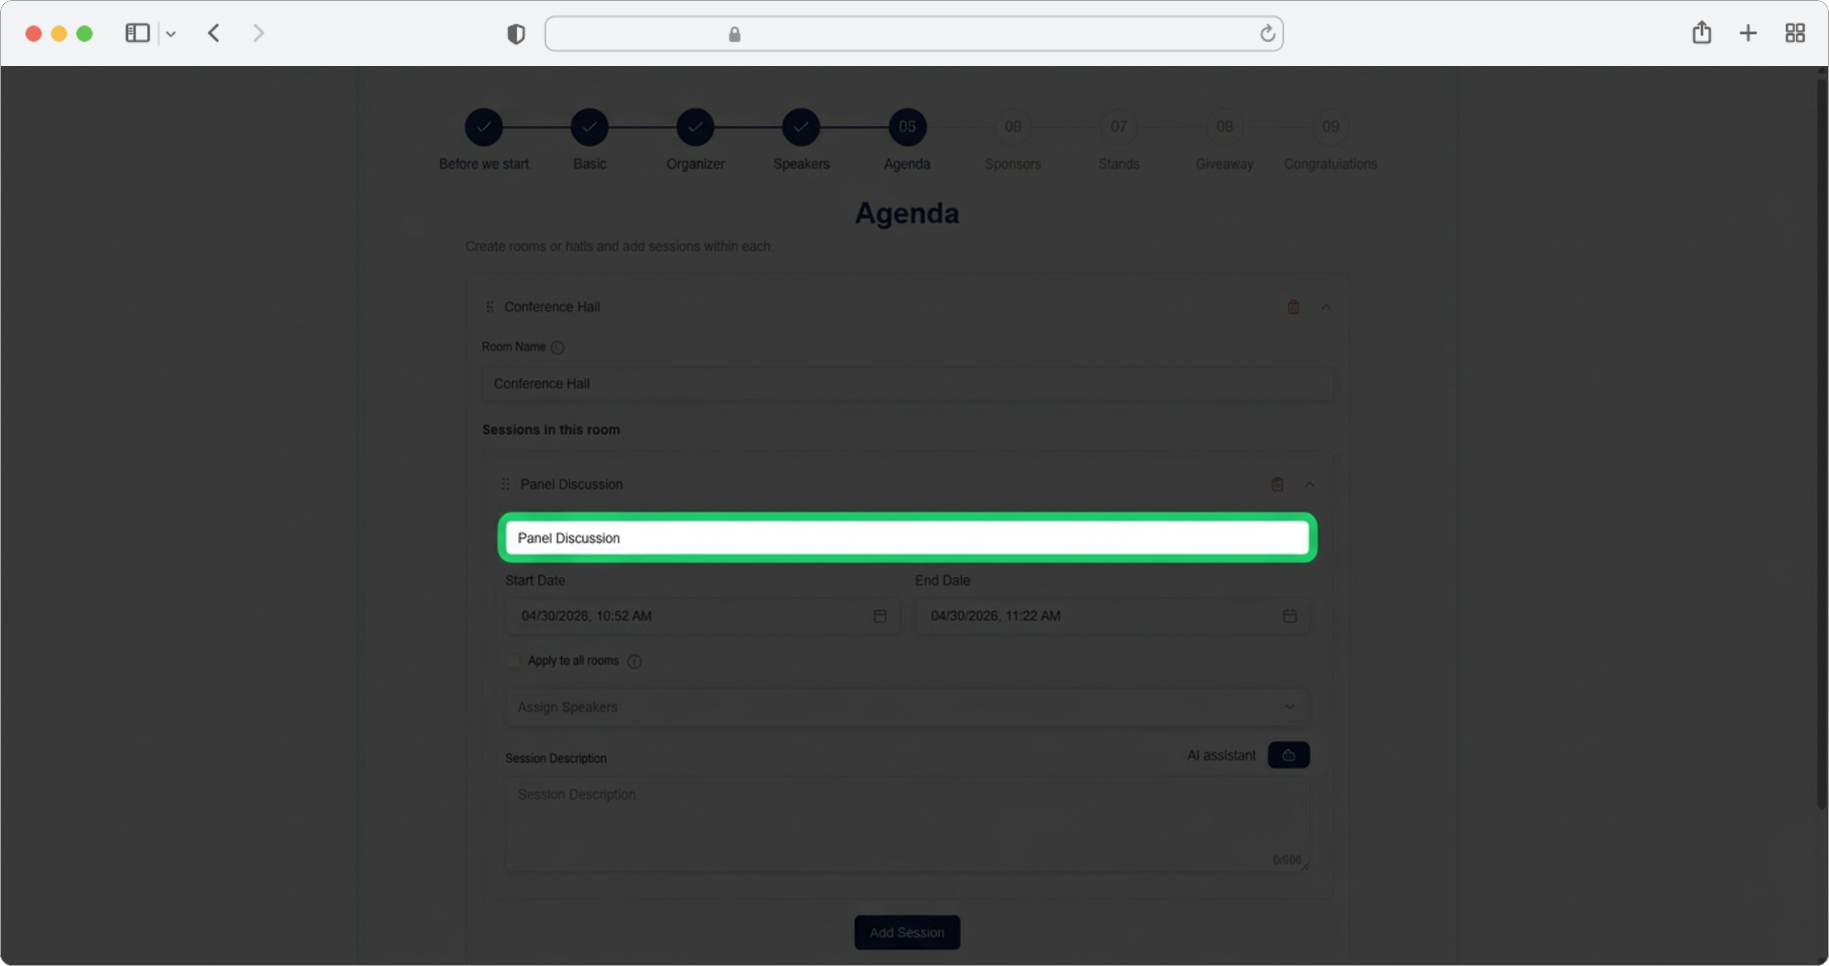
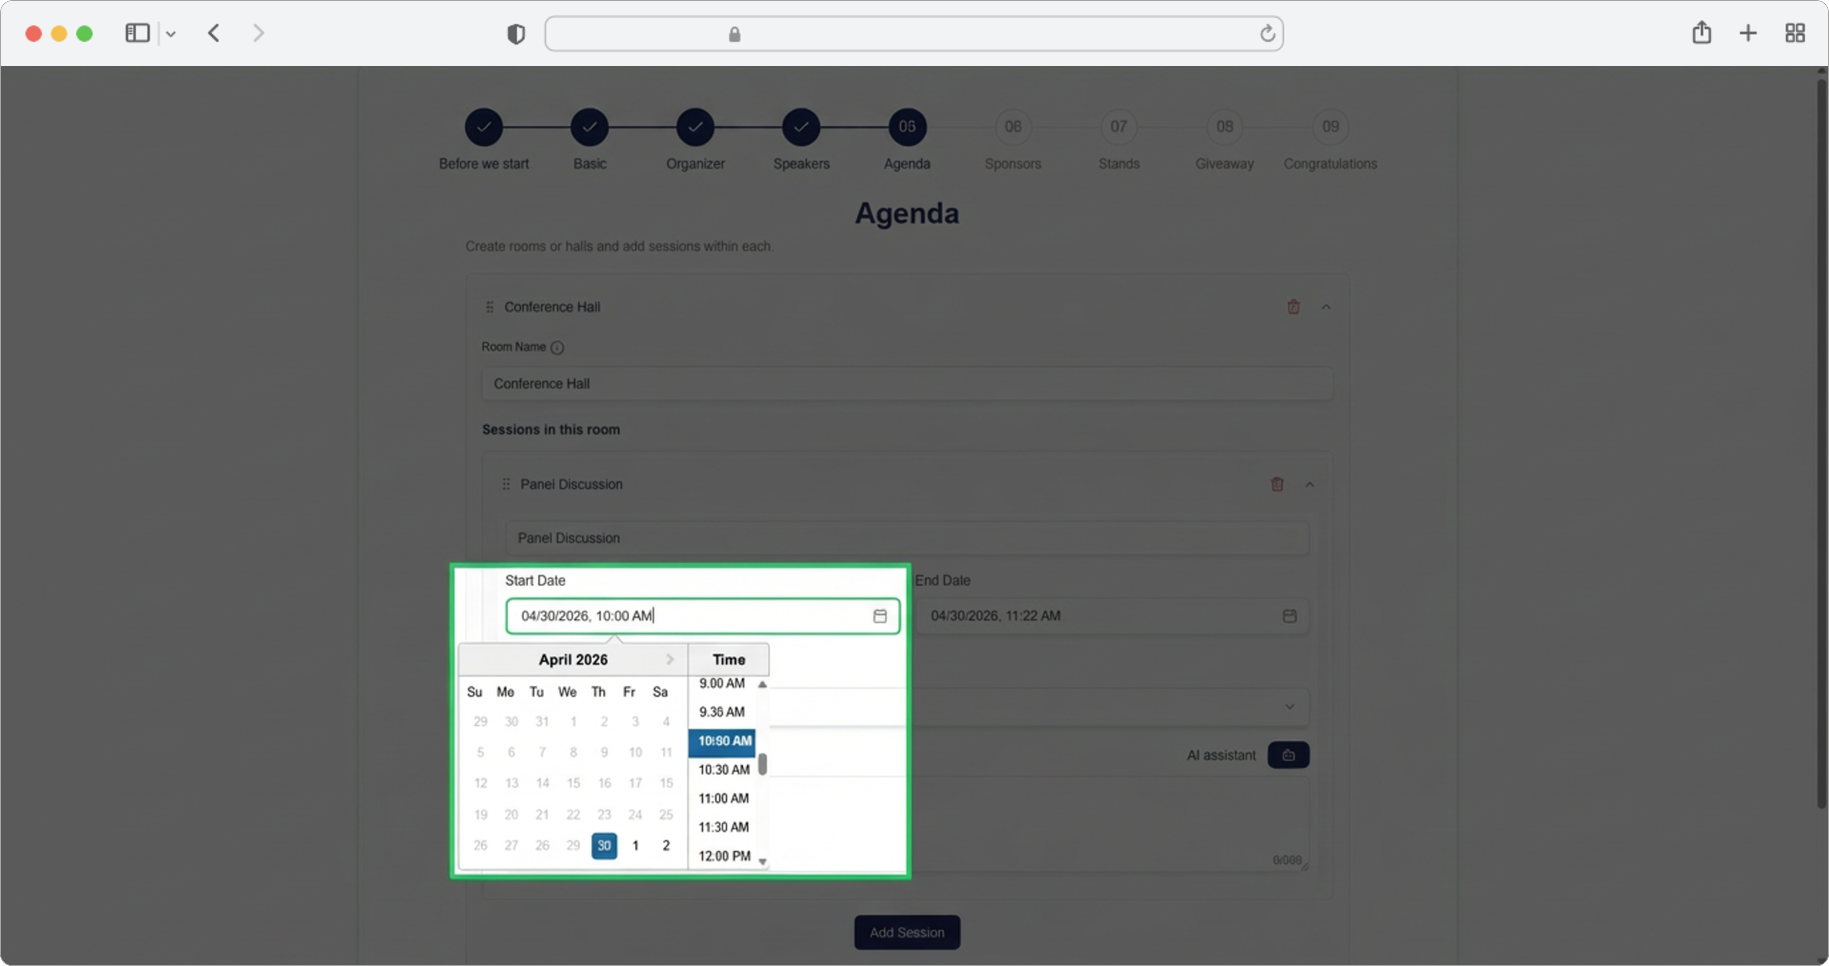
Session Start Time
Required field. Click on the "Start date" field and select the date and time the session starts. A date and time picker will appear — a calendar-like popup where you select a date and time. If the predefined times do not suit you, select the time closest to yours, and then by clicking on the hours/minutes you can enter the desired time manually using your keyboard.
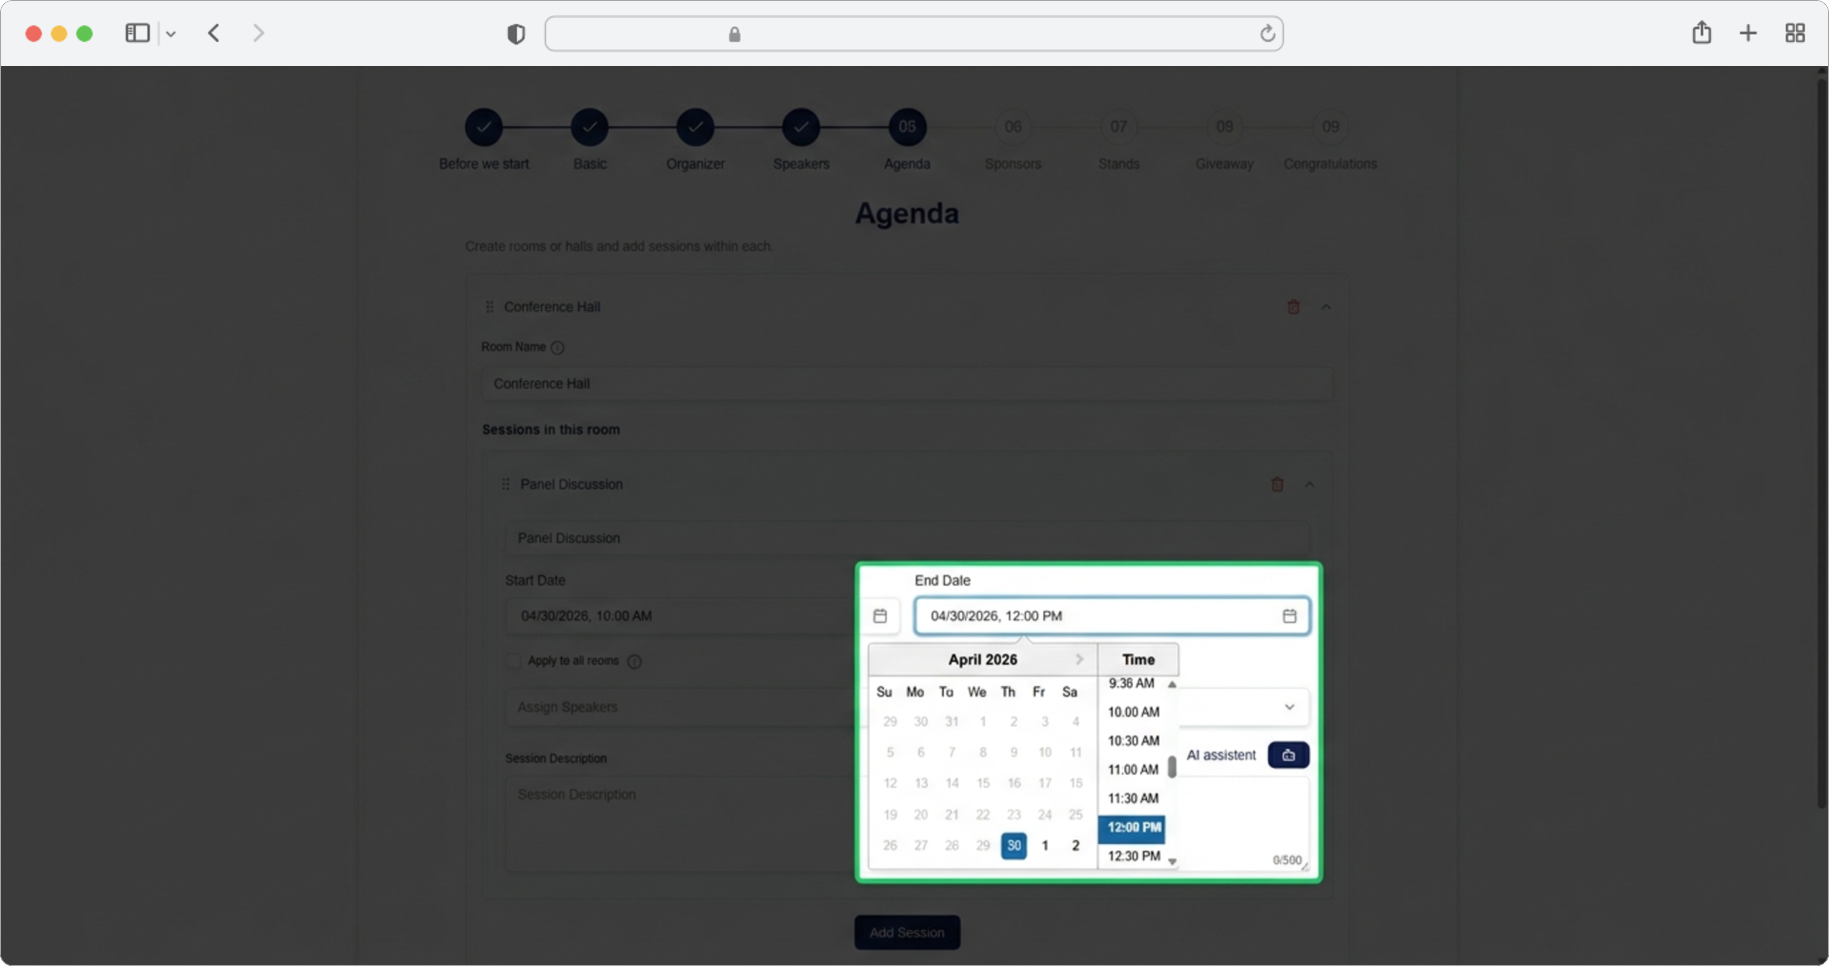
Session End Time
Required field. The same rules apply as when entering the start date and time. Click on the "End date" field and select the date and time the session ends.
Apply to All Rooms
You can check the checkbox next to "Apply to all rooms" if the entered session applies to all rooms. This is usually recommended for event openings, coffee breaks or lunches, or similar shared sessions that happen across all rooms at the same time.
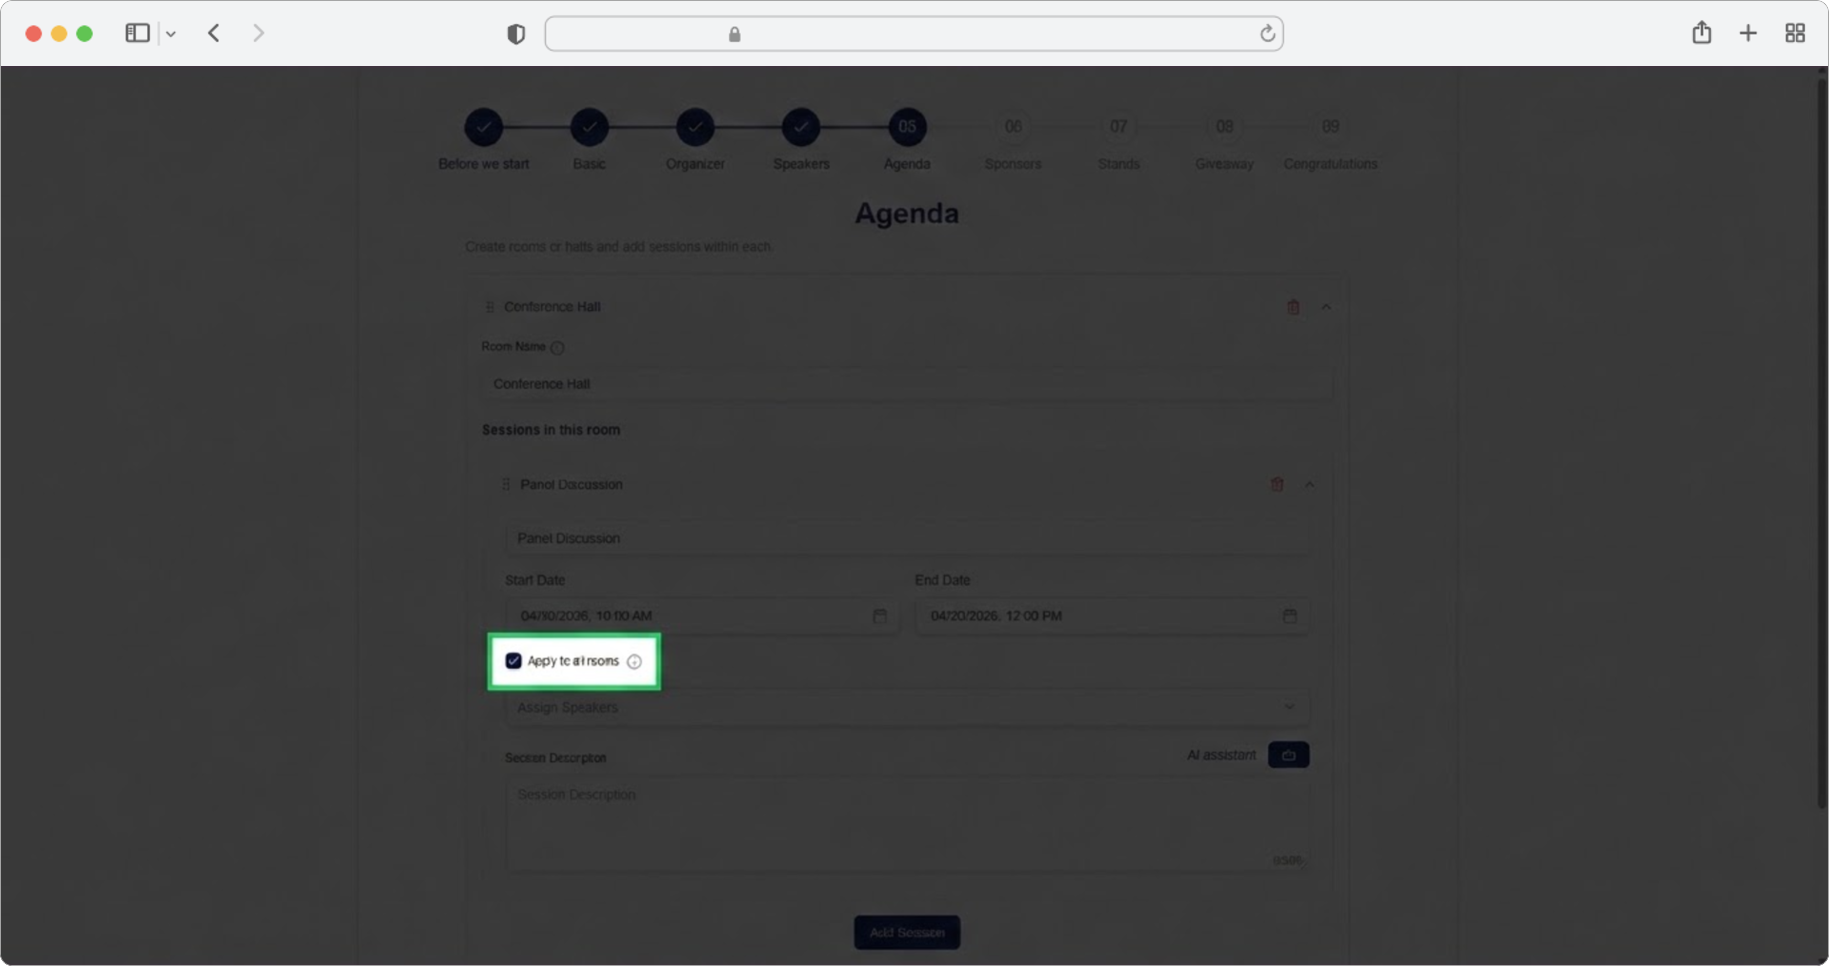
When to use 'Apply to all rooms'
Use this for sessions that happen simultaneously in all rooms, such as opening ceremonies, coffee breaks, lunch breaks, or closing remarks. This saves you from having to add the same session to each room individually.
Assign Speakers
Required field. Click on the search input field labeled "Assign speakers". A dropdown menu will appear showing all the speakers you added in the previous step (Step 4). You cannot add new speakers at this point — only speakers already added in Step 4 are available.
You can select one, more, or all assigned speakers — there is no limit to the number. One speaker can be assigned to multiple sessions.
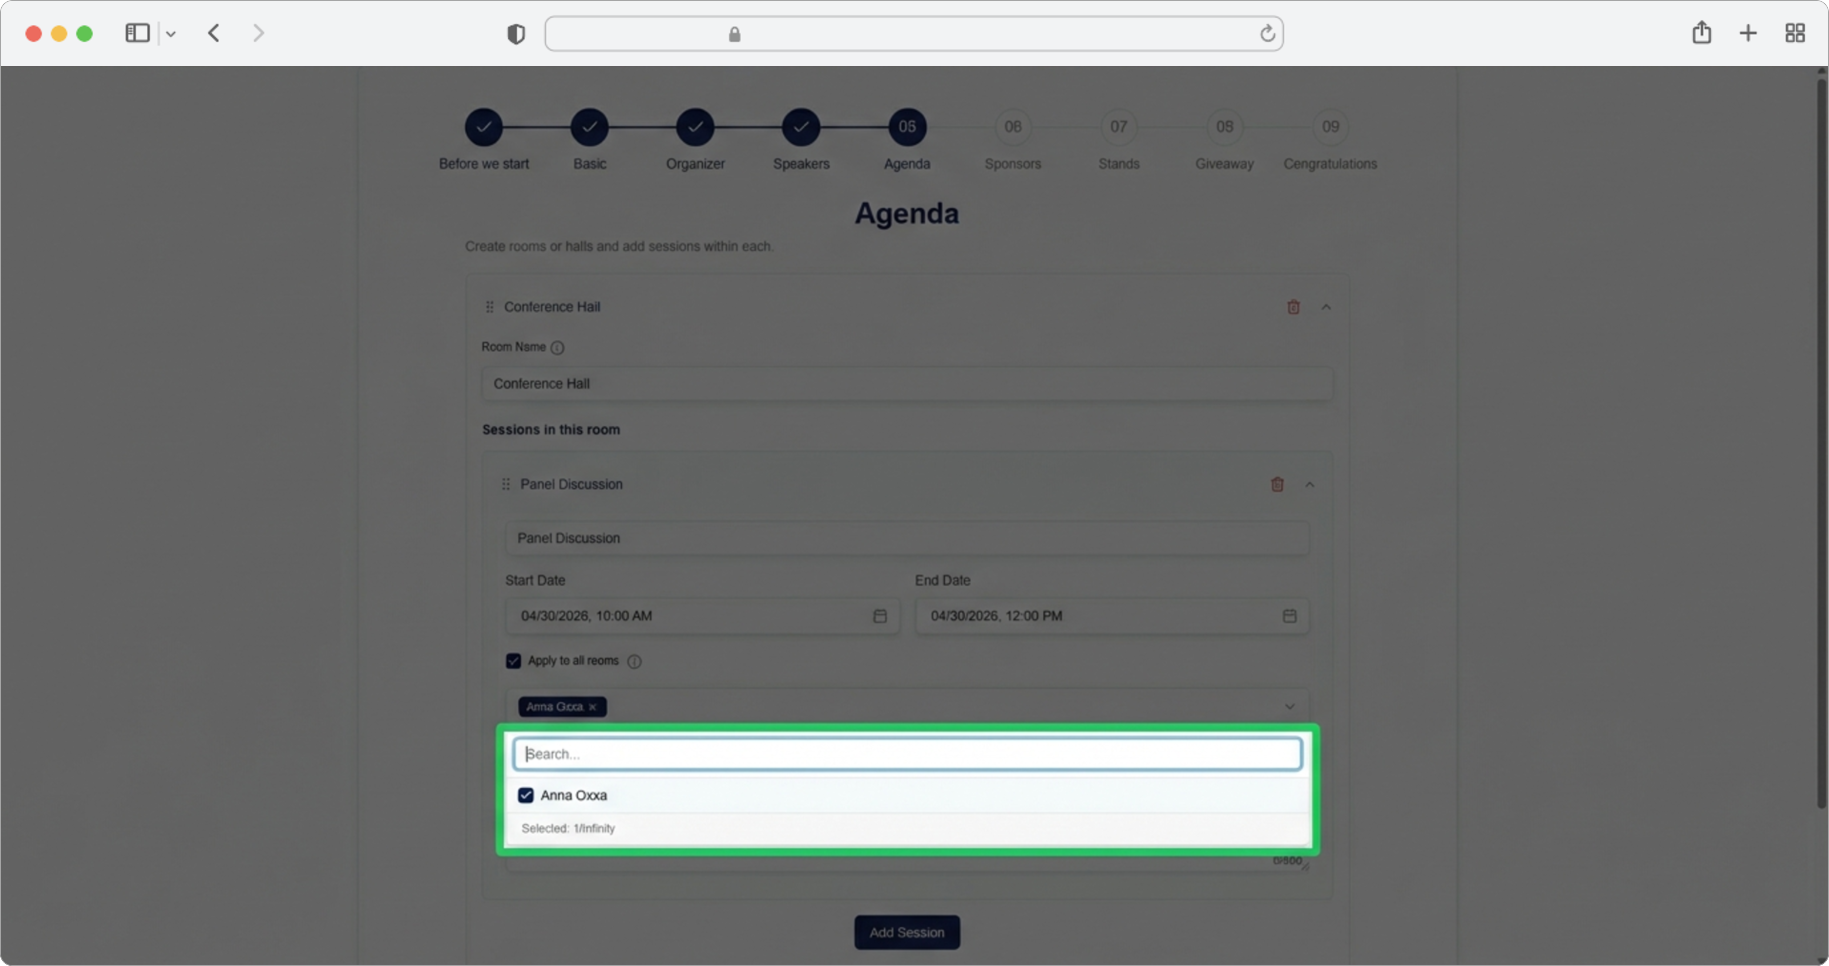
No speakers to assign?
If you did not add any speakers in Step 4, you will not have any speakers to assign here. If you need speakers for your agenda, go back and add them in Step 4 first.
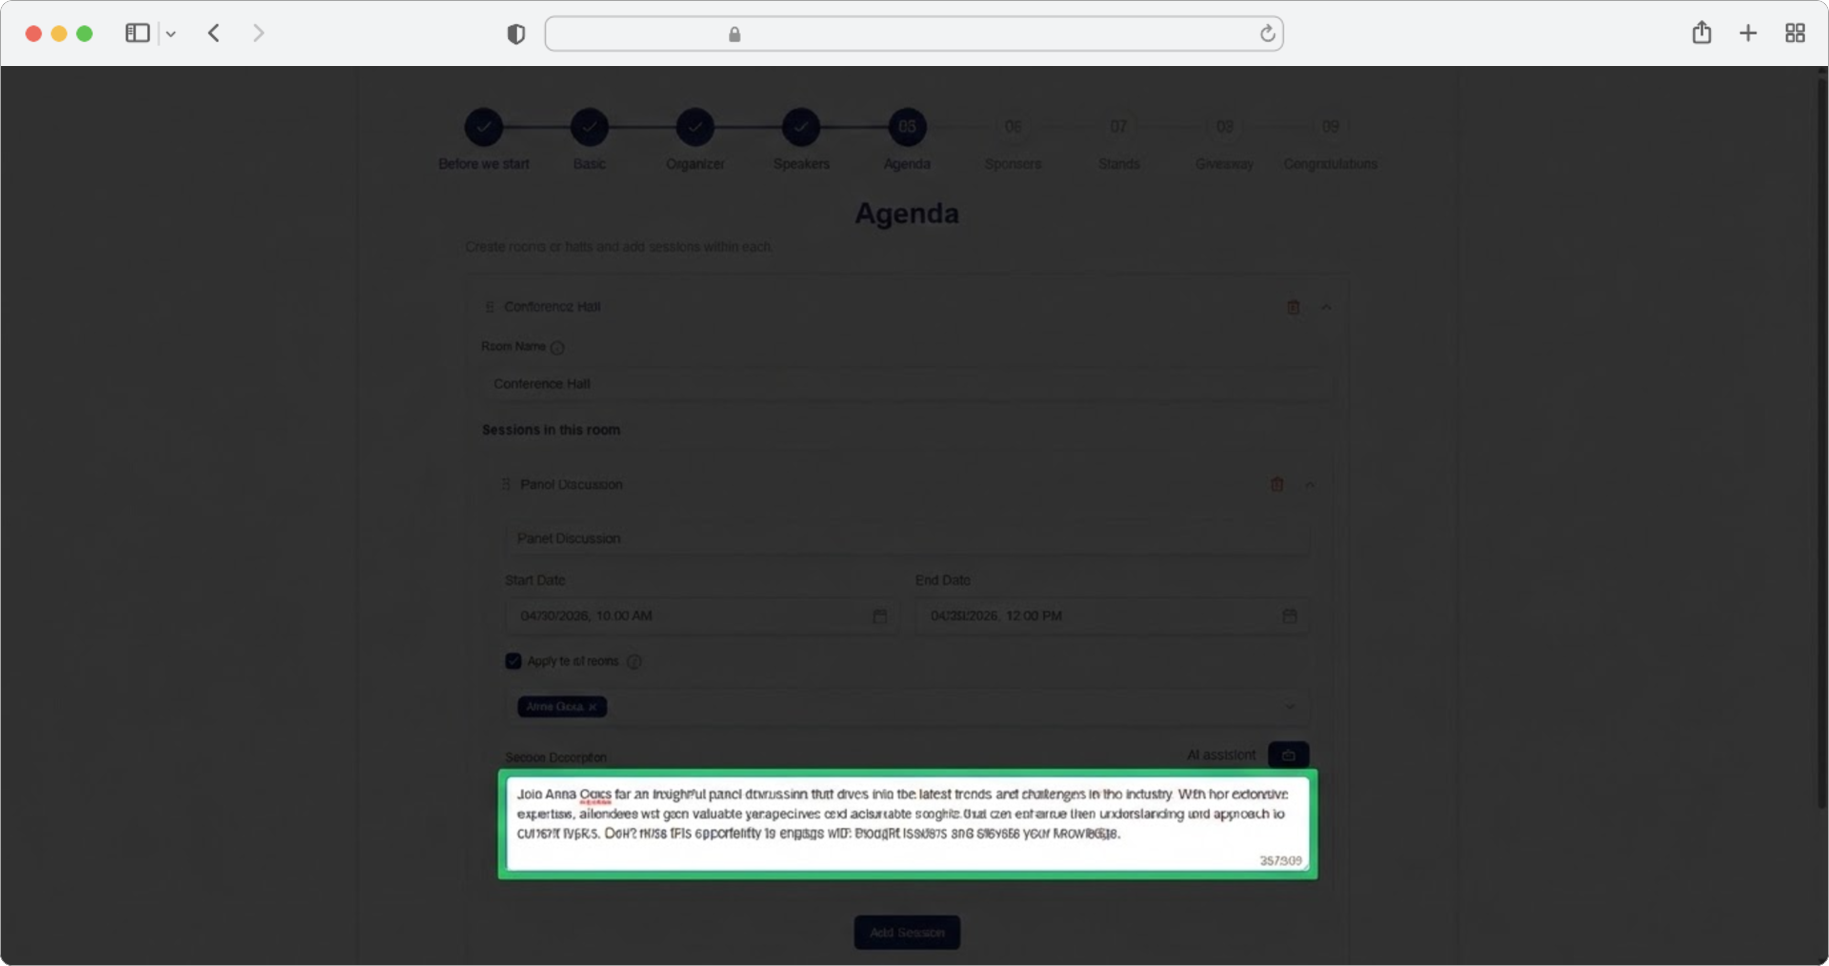
Session Description
Required field. Click on the text input field labeled "Session Description" and enter a short description of the session, up to 500 characters. Alternatively, click on the AI assistant icon, which will generate a suggestion for you. You can edit the generated text according to your own needs.
Add More Sessions or Rooms
Click "Add Session" again if you have more sessions in this room, or click "Add Rooms" if you want to add a new room.

Managing Multiple Sessions and Rooms
You can add as many sessions and rooms as you want. Keep in mind that each time a new session or room is added, the expander with their information will collapse (fold up), while the expander for entering a new session or room will expand (open up).
Sessions and Rooms can be easily deleted by clicking the Trash icon (a small icon that looks like a trash can) to the right of the name. You can also change the display order by clicking the icon to the left of the name and then using the drag and drop method (click and hold, then move to the new position and release) to arrange them in the desired position.

Time overlapping is not allowed
Time overlapping of sessions within one room is not allowed. If you try to create two sessions in the same room that overlap in time, the system will not accept it. Also, after saving, sessions will be automatically sorted by time.