Email Campaign
The Email Campaign feature allows you to invite or notify people about your event by email. If you have email addresses of your contacts, you can easily enter them manually one by one, or import a pre-made list in CSV format. After composing your email, you send the campaign to everyone on your mailing list with a single click.
This guide walks you through every step — from finding your event, writing the email, building your contact list, and sending the campaign.
Starting an Email Campaign
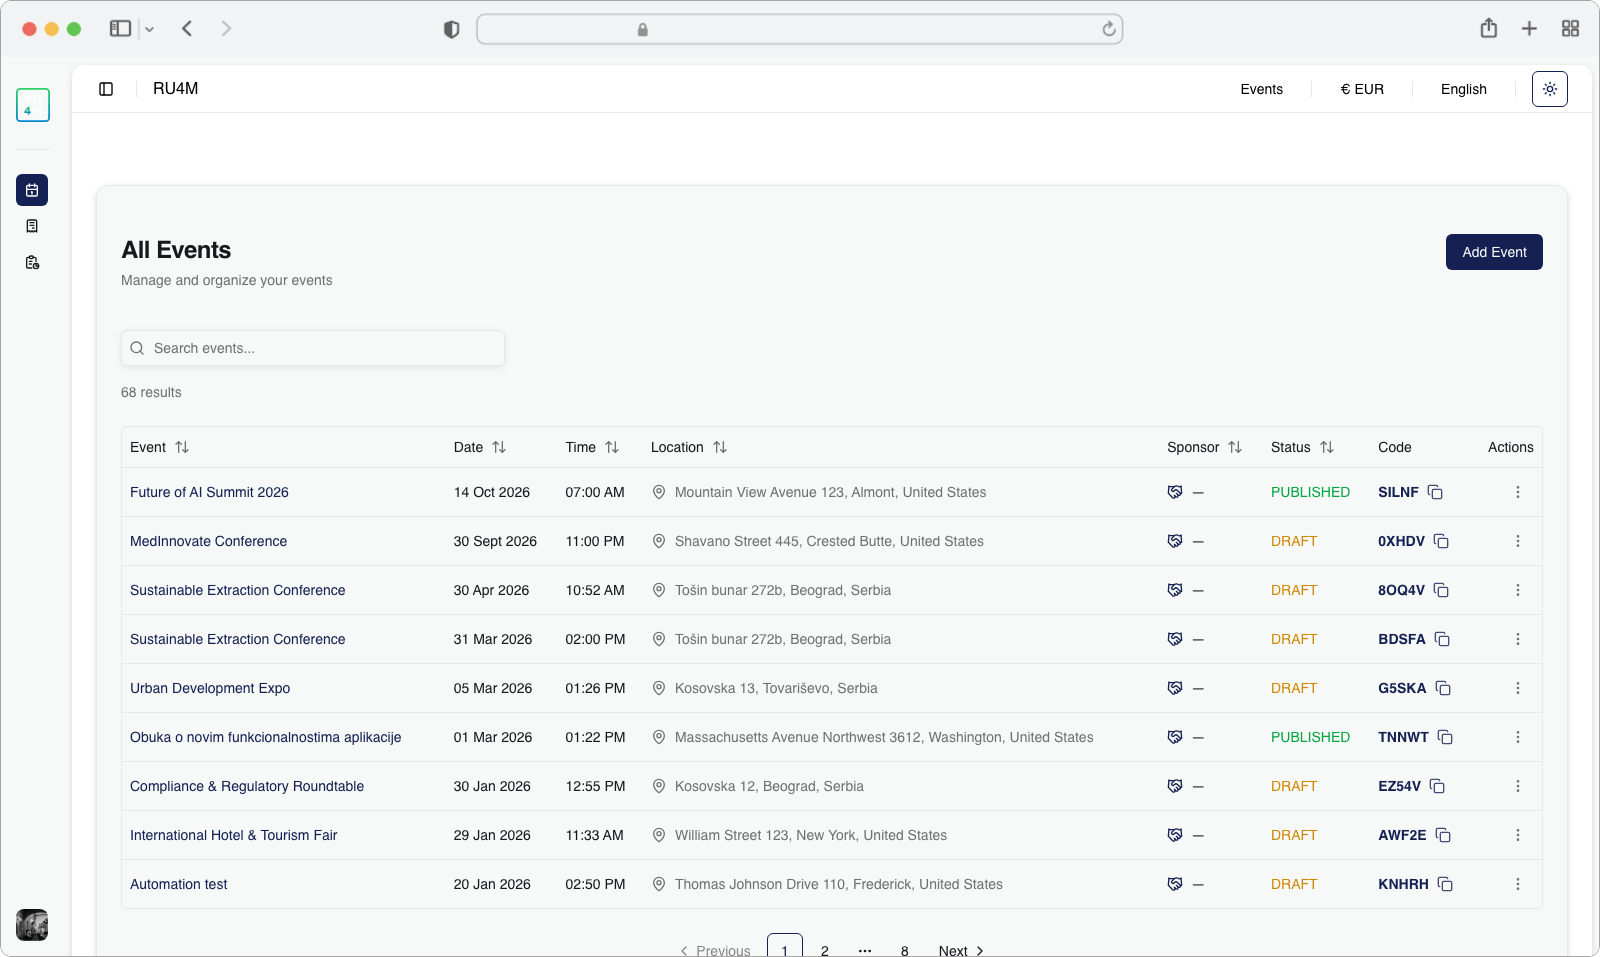
To create an email campaign, you first need to navigate to the Dashboard landing page. This is the main page you see after logging in, where all your events are listed in a table.
Find your event
Look at the events table in the center of the page. This table shows all events you have created or have permission to moderate. Each row displays the event name, date, time, location, sponsor, status, and invite code.
If you have many events, use the search bar at the top of the table. Click on the search field (it has a magnifying glass icon) and type part of the event name. The results will update automatically as you type.
Tip
You can also sort the table by clicking on any column header (Event, Date, Time, Location, etc.). Click once to sort ascending, click again to sort descending.
Open the actions menu
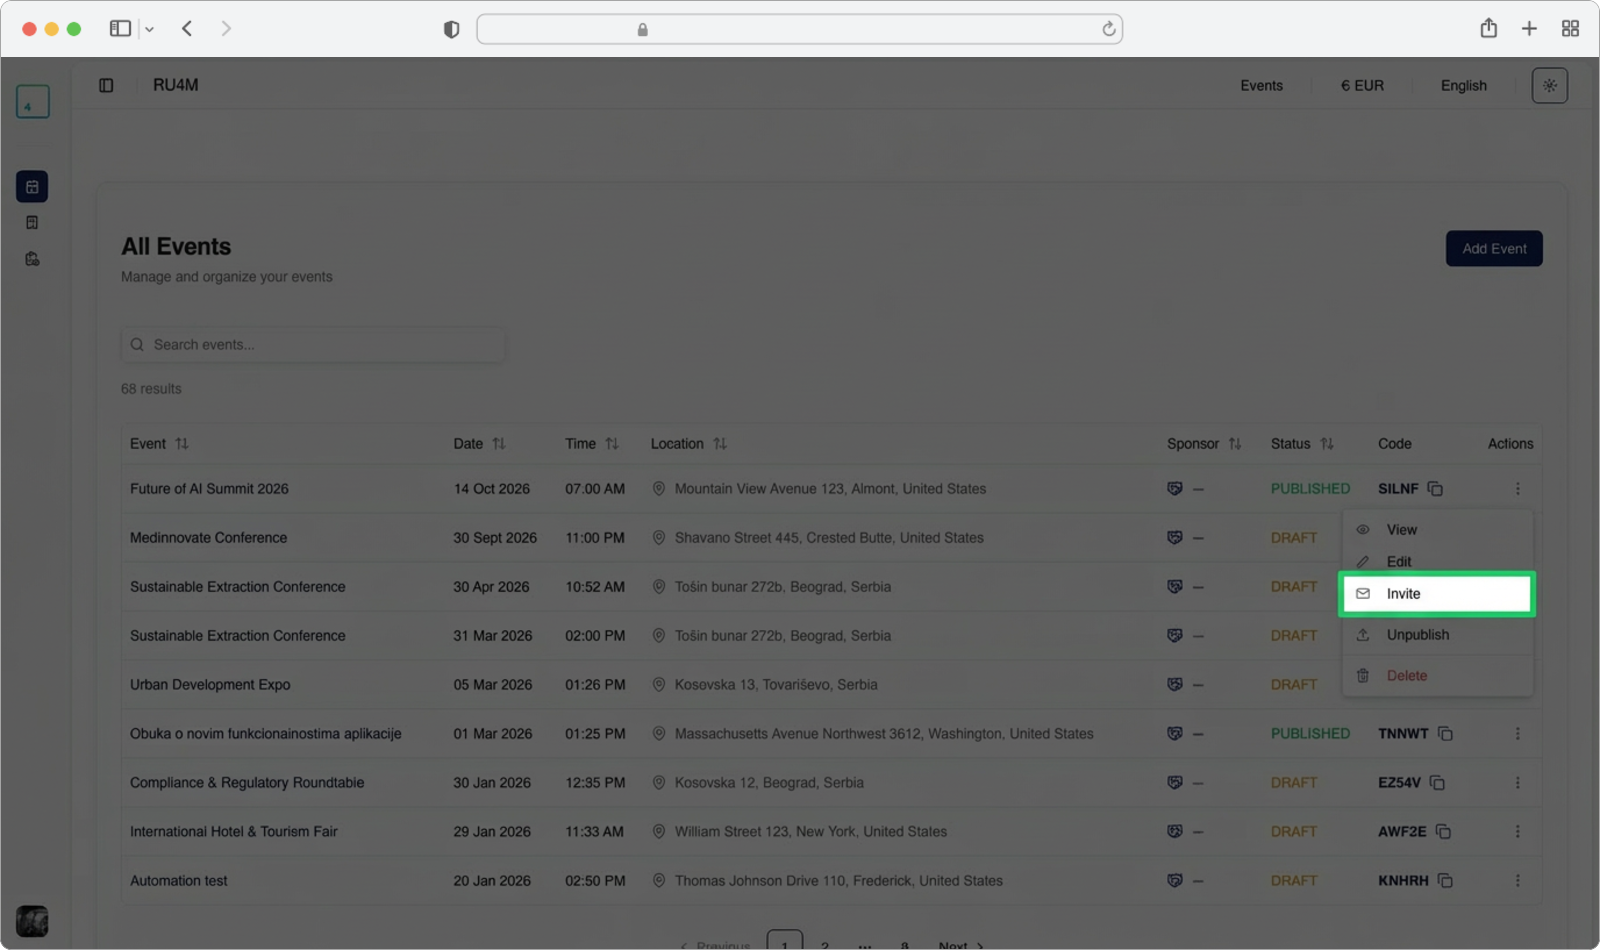
Once you have found your event, look at the far right side of that event's row. You will see a small icon with three vertical dots (sometimes called a "kebab menu" or "more options" icon). Click on this icon.
A small dropdown menu will appear with several options: View, Edit, Invite, Unpublish, and Delete.
Click on the "Invite" option. It is displayed in a distinct color to make it easy to spot.
What is a dropdown menu?
A dropdown menu is a small list of options that appears when you click on a button or icon. It "drops down" from the element you clicked, showing you choices you can select from.
The email campaign page
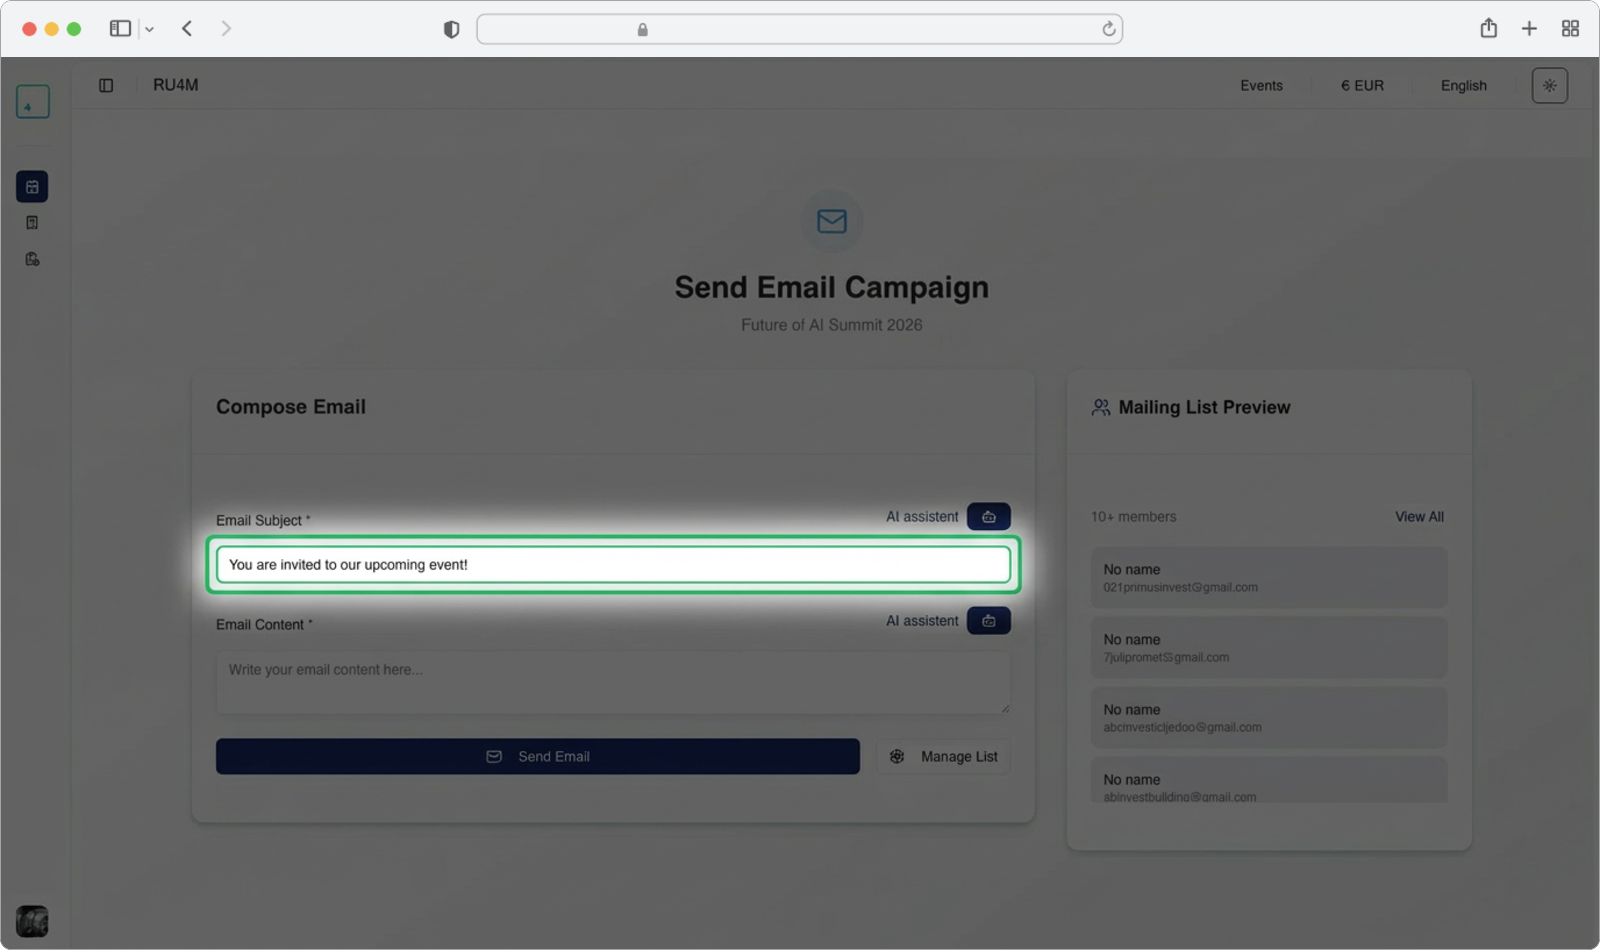
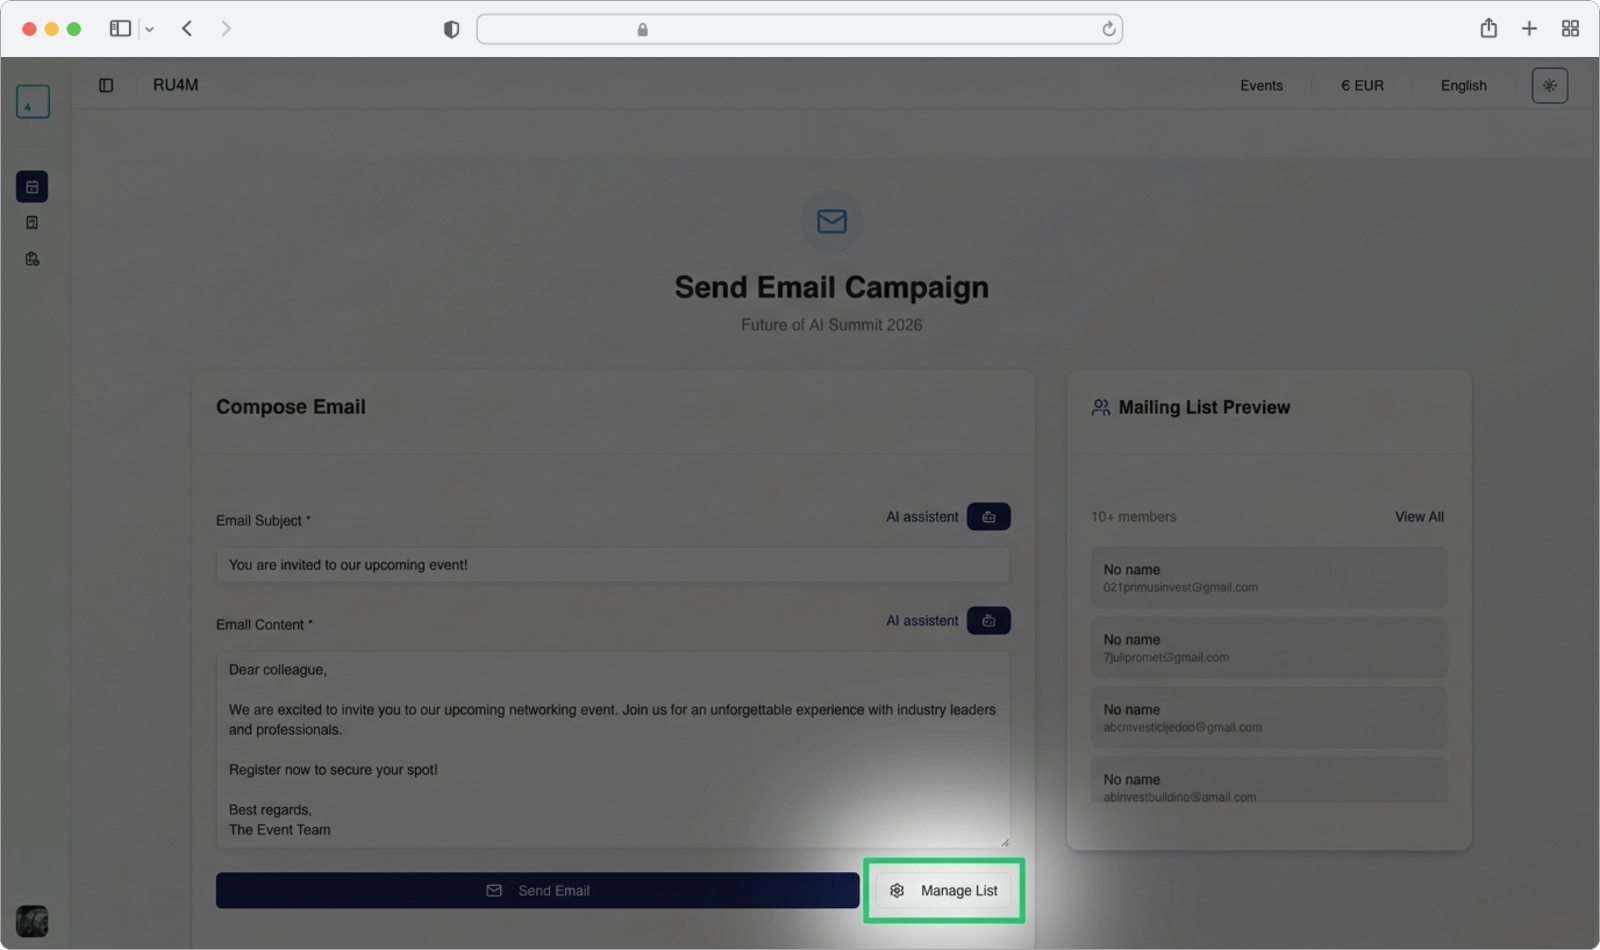
After selecting "Invite", you will be taken to a new page titled "Send Email Campaign". Below the title, you will see the name of your event (for example, "Future of AI Summit 2026").
This page has two main sections:
- Compose Email (on the left) — where you write your email subject and content
- Mailing List Preview (on the right) — where you can see and manage the contacts who will receive your email
At the bottom of the Compose Email section, you will see two buttons: "Send Email" (which is grayed out until you add members) and "Manage List".

Write the email subject
Look at the Compose Email section on the left side of the page. The first field is labeled "Email Subject" with a red asterisk (*) indicating it is required.
Click on the text input field that says "Enter email subject" and type the subject line for your email. This is the first thing recipients will see in their inbox, so make it clear and attention-grabbing.
Alternatively, you can click on the "AI assistant" button (located to the right of the "Email Subject" label). This button has a small robot icon next to it. The AI will automatically generate a subject line for you based on your event details. You can then edit the generated text to fit your needs.
Using the AI Assistant
The AI assistant generates content in the language you have selected in the top-right corner of the page (English or Srpski). If you want the AI to generate content in Serbian, make sure to switch the language first before clicking the AI assistant button.
Write the email content
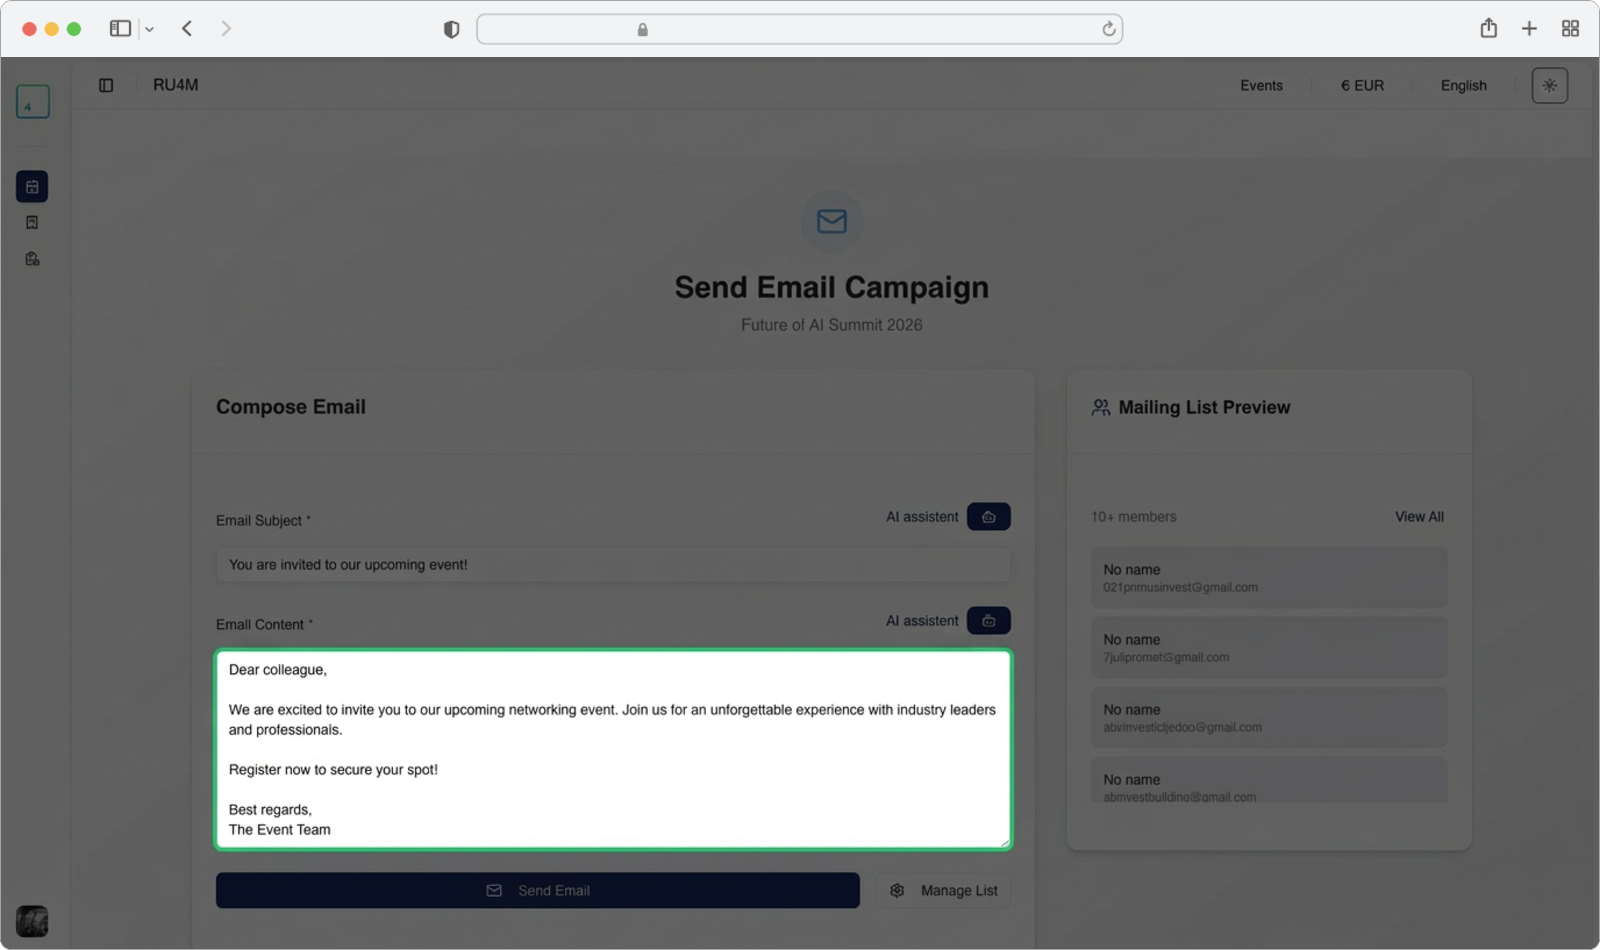
Below the subject field, you will see a second field labeled "Email Content" (also marked with a red asterisk as required).
Click on the text area that says "Write your email content here..." and type the body of your email. This is where you provide details about your event, include invitations, or share any other information you want your recipients to know.
Just like the subject field, you can click on the "AI assistant" button to the right of "Email Content" to have the AI generate the email body for you. You can modify the generated content however you like.
Open the contact list manager
Now you need to add people to your mailing list — these are the email addresses that will receive your campaign.
Look at the bottom right of the Compose Email section. You will see a button that says "Manage List" with a gear icon next to it. Click on this button.
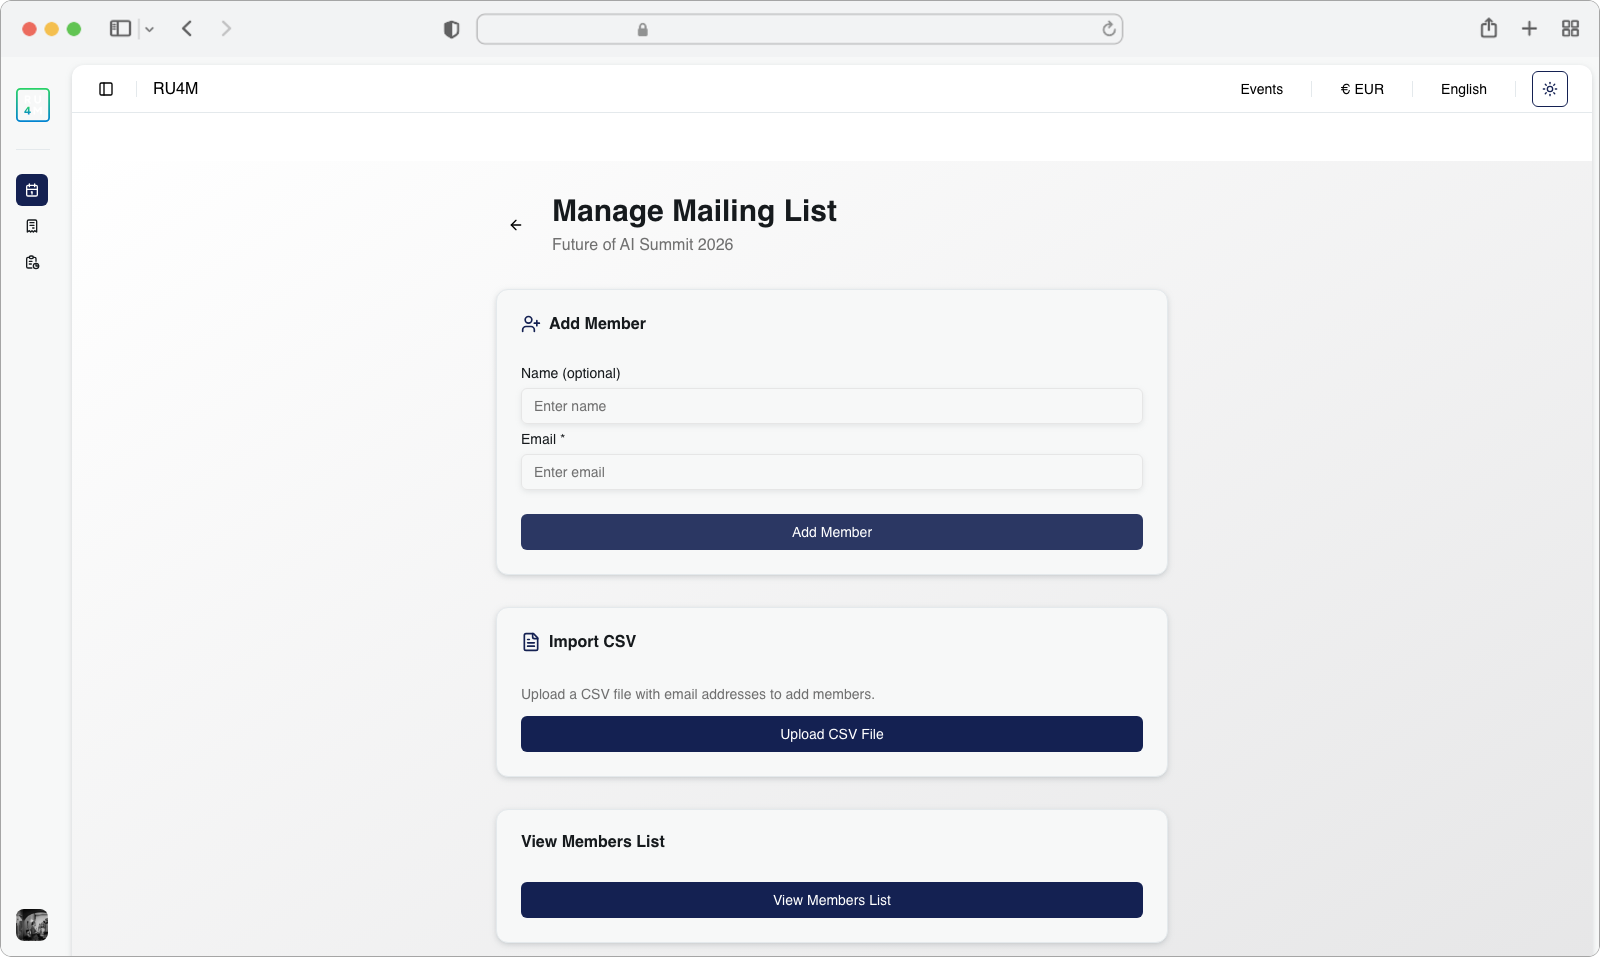
The Manage Mailing List page
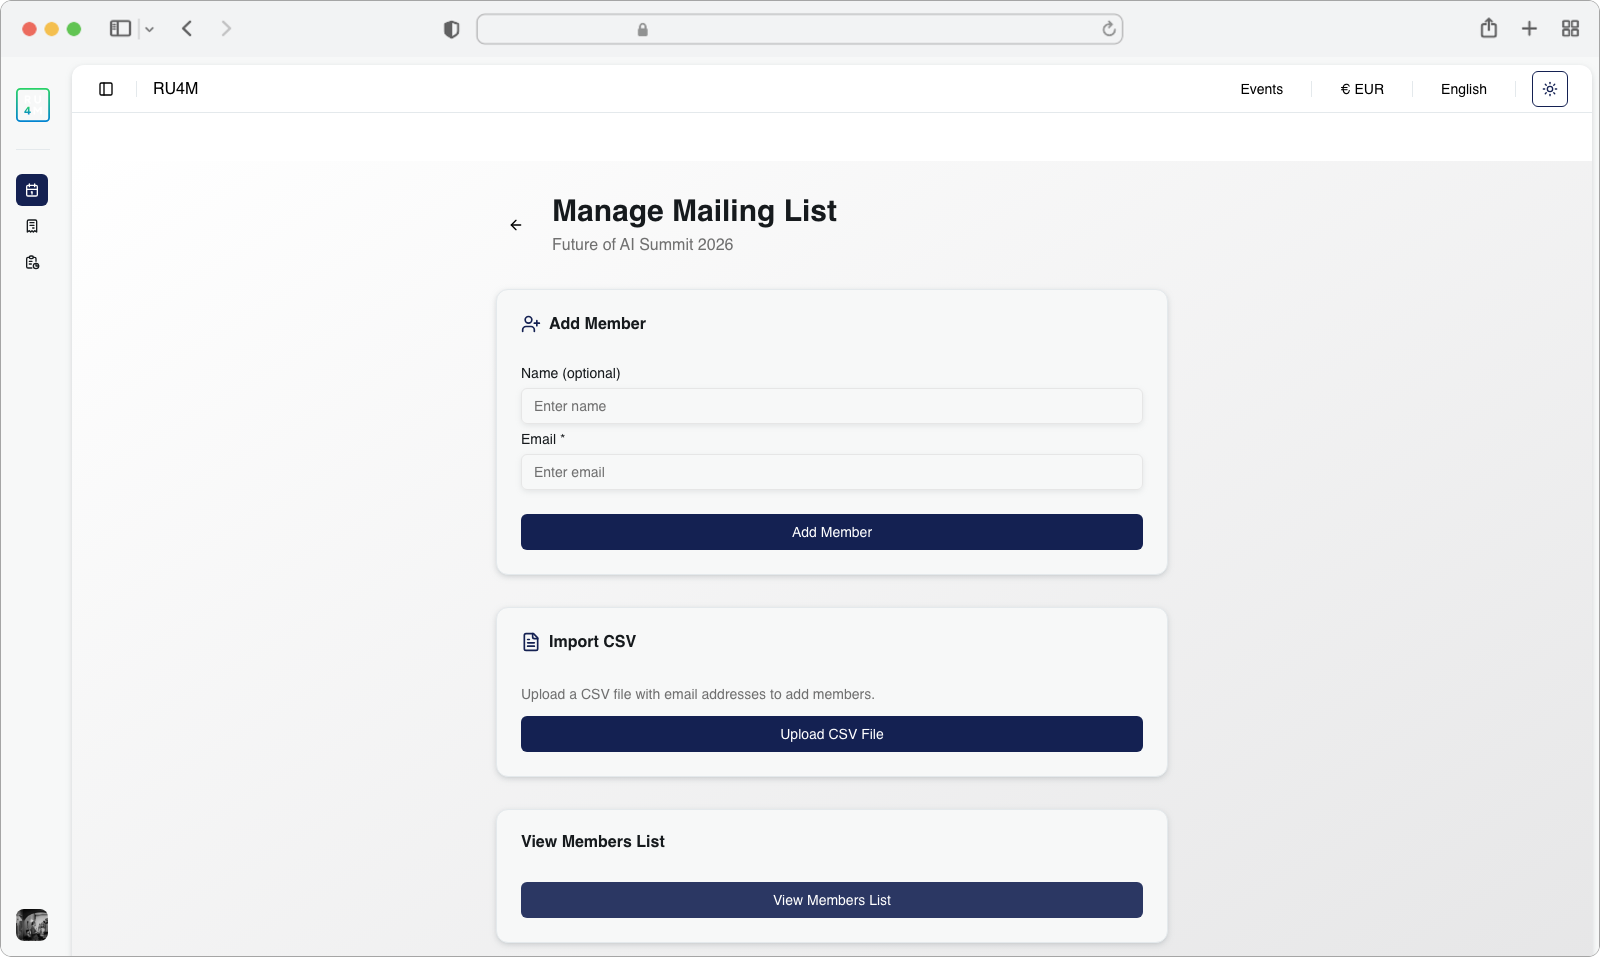
After clicking "Manage List", you will be taken to a new page titled "Manage Mailing List". Below the title, you can see the event name and the current number of contacts in your list.
This page has three sections, each offering a different way to manage your contacts:
- Add Member — Add contacts one at a time by typing their email and (optionally) their name
- Import CSV — Upload a file containing many email addresses at once
- View Members List — See and manage all contacts currently on your list
Adding Members Manually
This method is recommended if you only need to add a few contacts to your mailing list. You enter each email address one by one.
Enter the email address
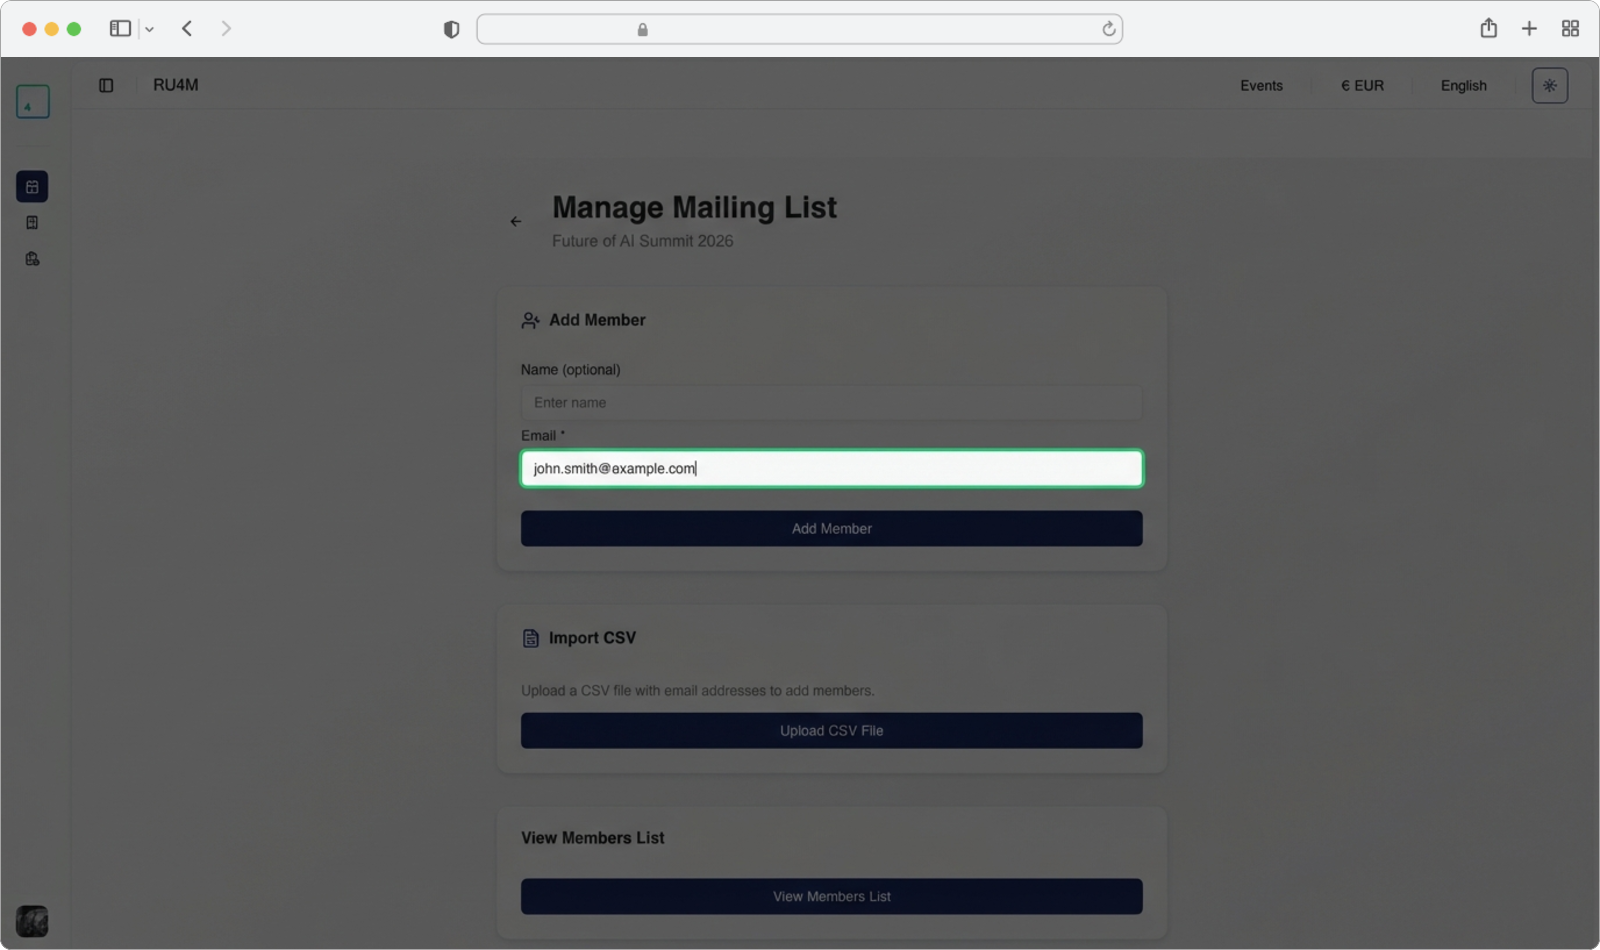
Inside the "Add Member" section at the top of the Manage Mailing List page, you will see two input fields. The first one is labeled "Email" and is marked with a red asterisk (*), meaning it is required.
Click on the text field that says "Enter email" and type the email address of the person you want to add.
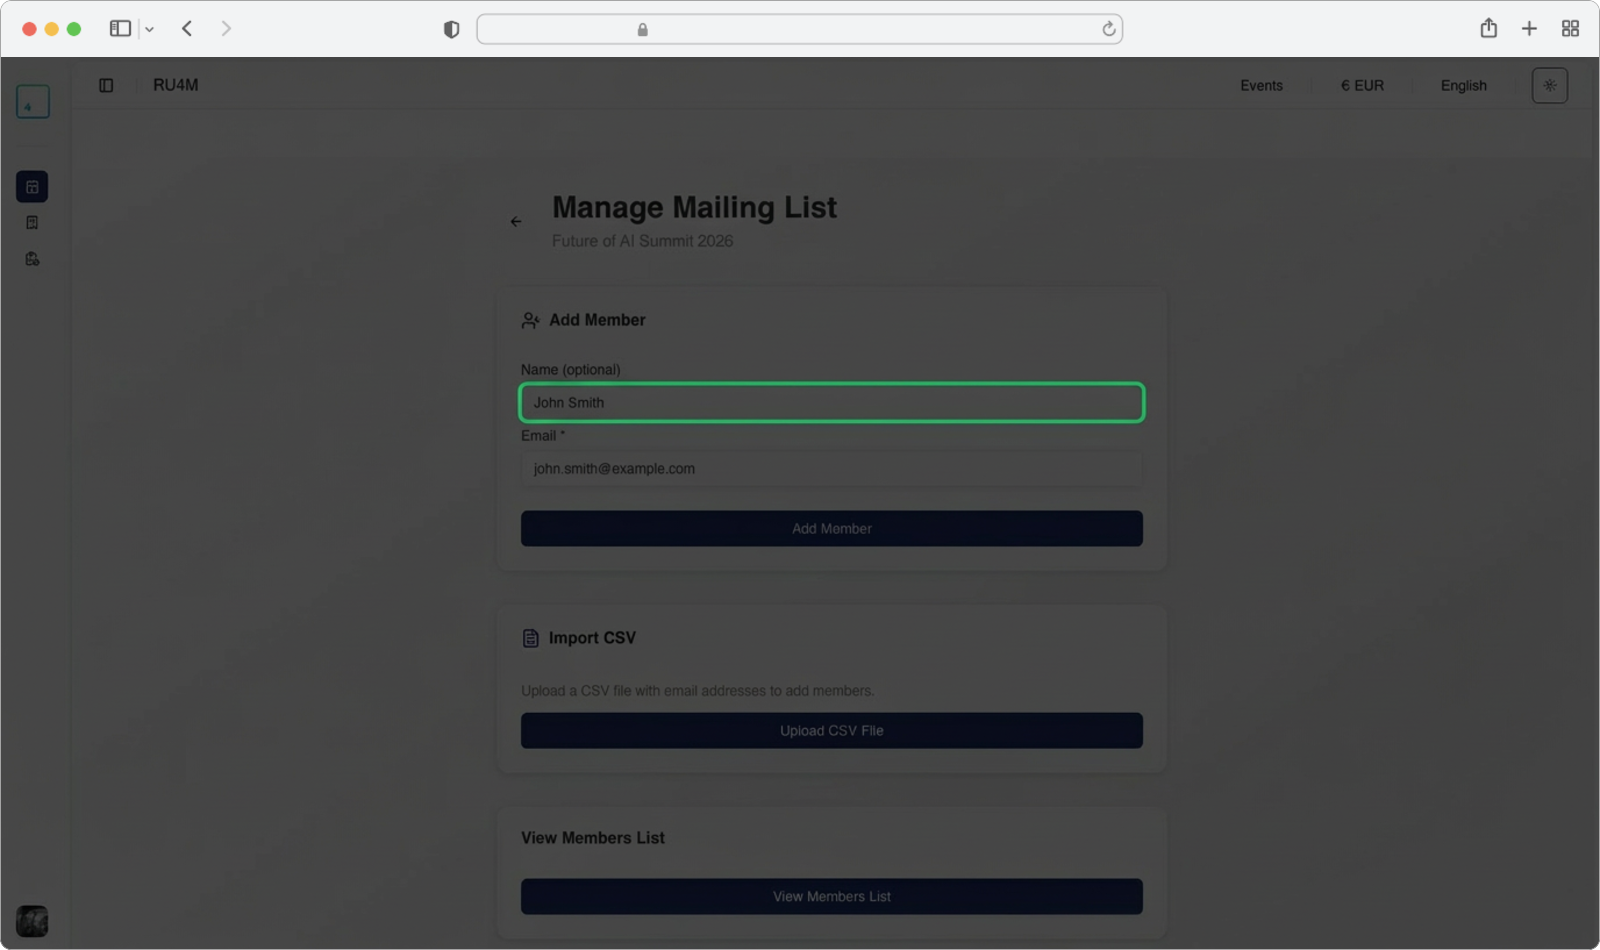
Enter the name (optional)
Above the email field, there is another field labeled "Name (optional)". This field is not required, but if you know the person's name, you can click on this field and type it. Adding a name helps you identify contacts in your mailing list later.
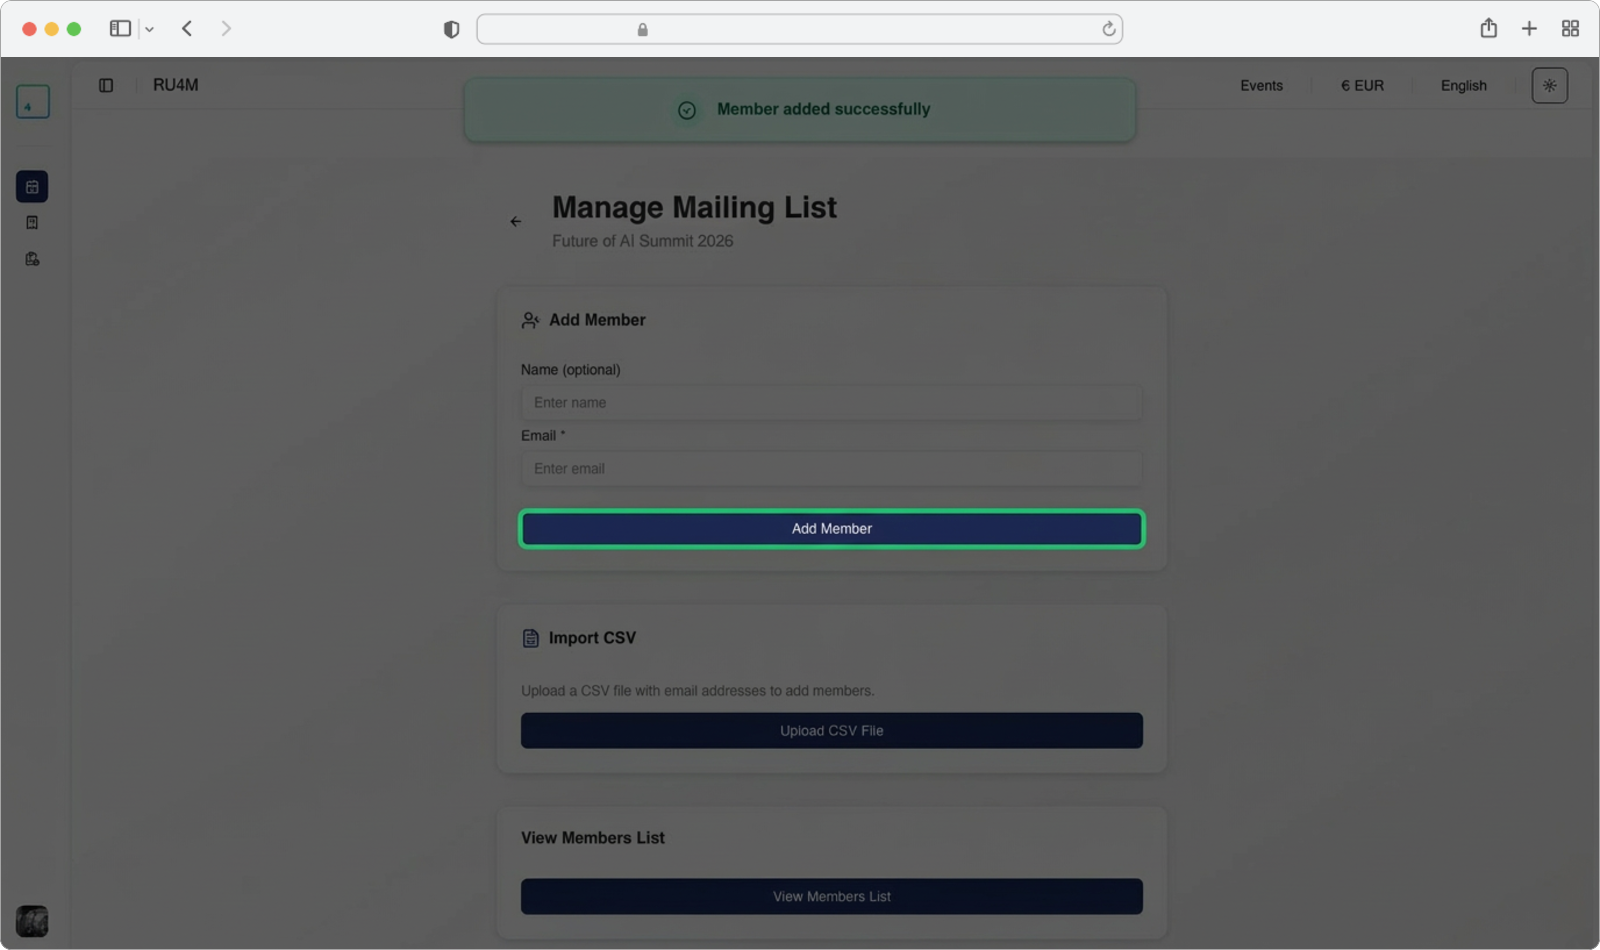
Confirm the entry
Once you have entered the email (and optionally the name), click the "Add Member" button. This is a large, dark-colored button below the input fields.
After clicking, you will see a confirmation message that the contact has been successfully added. The input fields will automatically clear, so you can immediately type the next contact's email and repeat the process.
Tip
You can add as many contacts as you need by repeating these three steps. Each time you click "Add Member", the new contact is saved and the fields reset for the next entry.
Importing a CSV File
This method is recommended if you already have a pre-made list of email addresses saved in a CSV file. A CSV file is a simple text file where data is separated by commas — it can be created in any spreadsheet program (like Microsoft Excel or Google Sheets) and saved in .csv format.
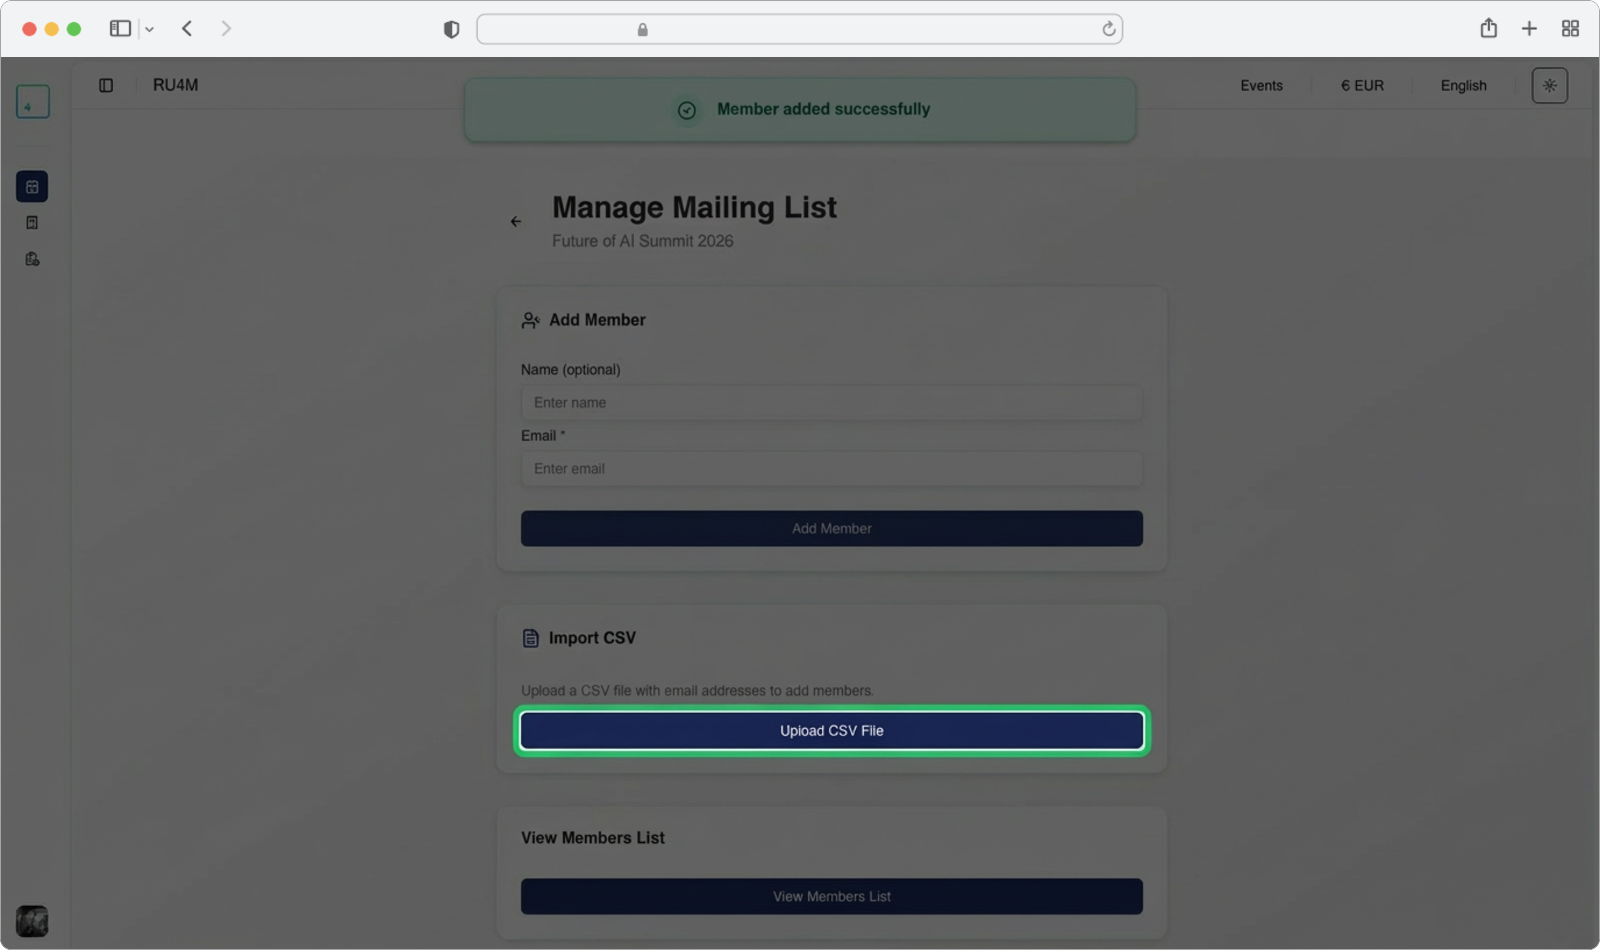
Upload the CSV file
Inside the "Import CSV" section (the middle section on the Manage Mailing List page), click the "Upload CSV File" button. It is a large, dark-colored button.
A file browser window will open on your computer. Navigate to the folder where your CSV file is saved, click on the file to select it, and then click "Open".
What is a CSV file?
CSV stands for "Comma-Separated Values". It is a simple file format used to store tabular data (like a list of emails). You can create one by opening a spreadsheet program, putting email addresses in one column, and saving the file as .csv. The file should contain one email address per row.
Upload confirmation
After selecting and opening the file, the list will be automatically updated. You will see a confirmation message showing the number of contacts that were successfully uploaded from your CSV file.
Important
Make sure your CSV file contains valid email addresses. Entries with invalid email formats may be skipped during the import. If some contacts were not imported, double-check the formatting of your CSV file.
Viewing and Managing Members
After adding contacts (either manually or via CSV import), you can review and edit your mailing list.
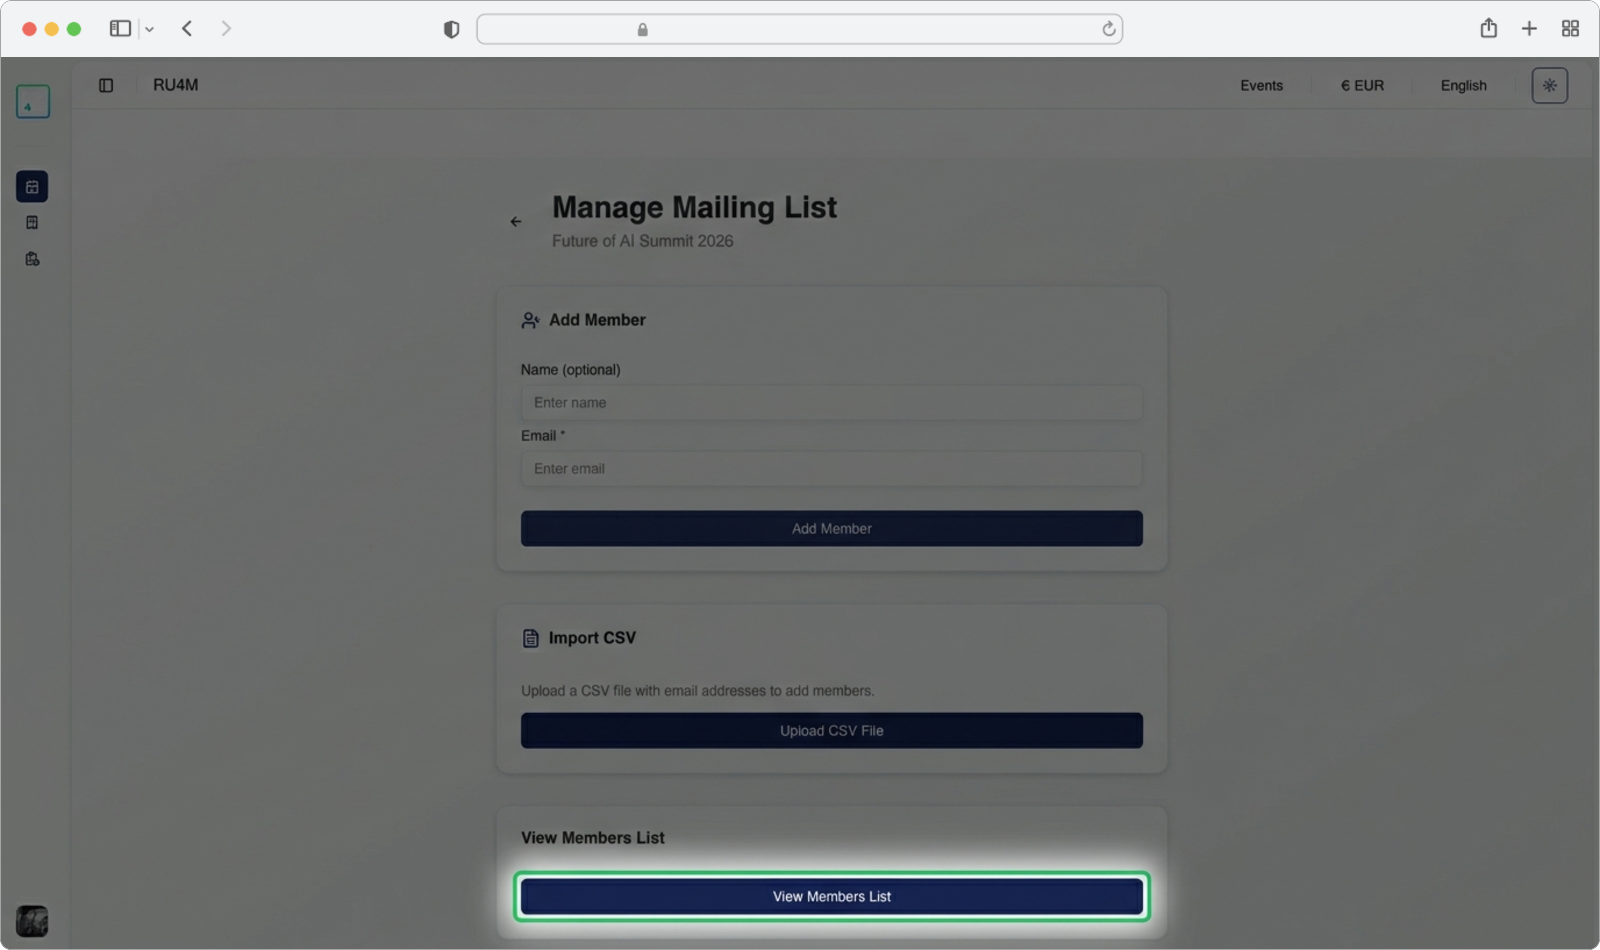
Open the members list
Inside the "View Members List" section (the bottom section on the Manage Mailing List page), click the "View Members List" button.
Manage your contacts
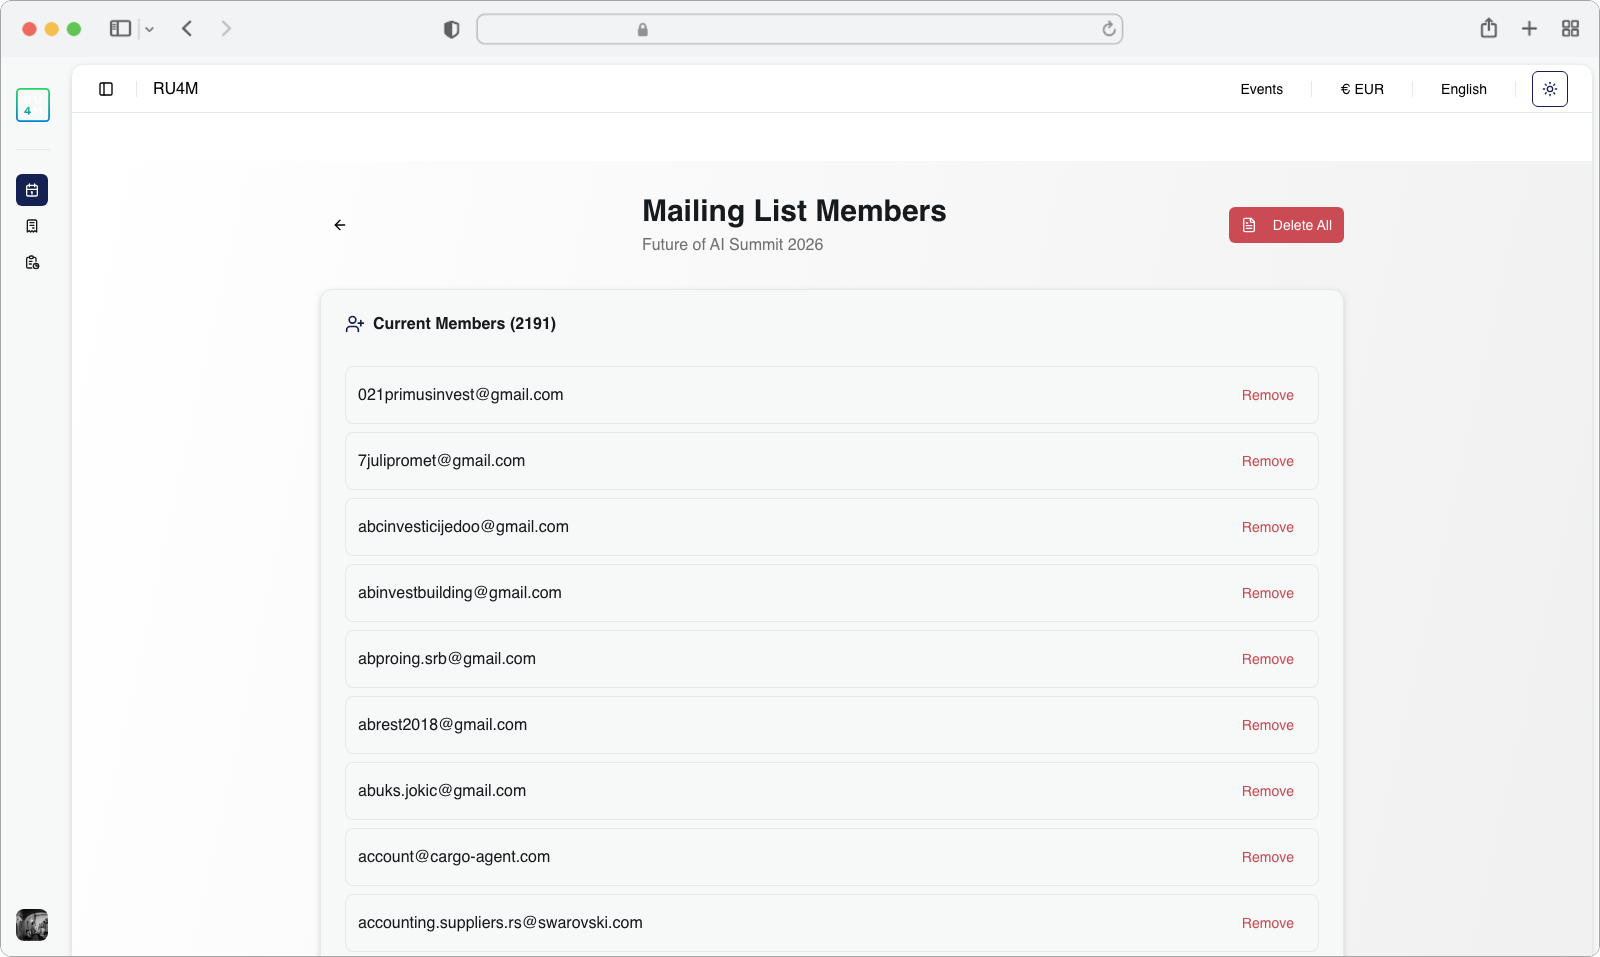
You will be taken to the "Mailing List Members" page. At the top, you can see the event name and the total number of contacts (for example, "Current Members (2190)").
Below the header, all of your contacts are listed with their email addresses. Each contact has a "Remove" button on the right side of their row.
To remove a single contact: Click the red "Remove" button next to the contact you want to delete.
To remove all contacts: Click the red "Delete All" button in the top-right corner of the page. This will clear your entire mailing list.
To go back to the campaign: Click the back arrow (a left-pointing arrow icon) at the top-left of the page, next to the "Mailing List Members" title. This will take you back to the email campaign page.
Be careful with Delete All
The "Delete All" button removes every contact from your mailing list. This action cannot be undone. Make sure you really want to clear the entire list before clicking this button.
Tip
Once you are satisfied with your mailing list, click the back arrow at the top of the page to return to the email campaign page and continue with sending your email.
Sending the Campaign
After you have written your email subject, email content, and added contacts to your mailing list, you are ready to send.
Review and send
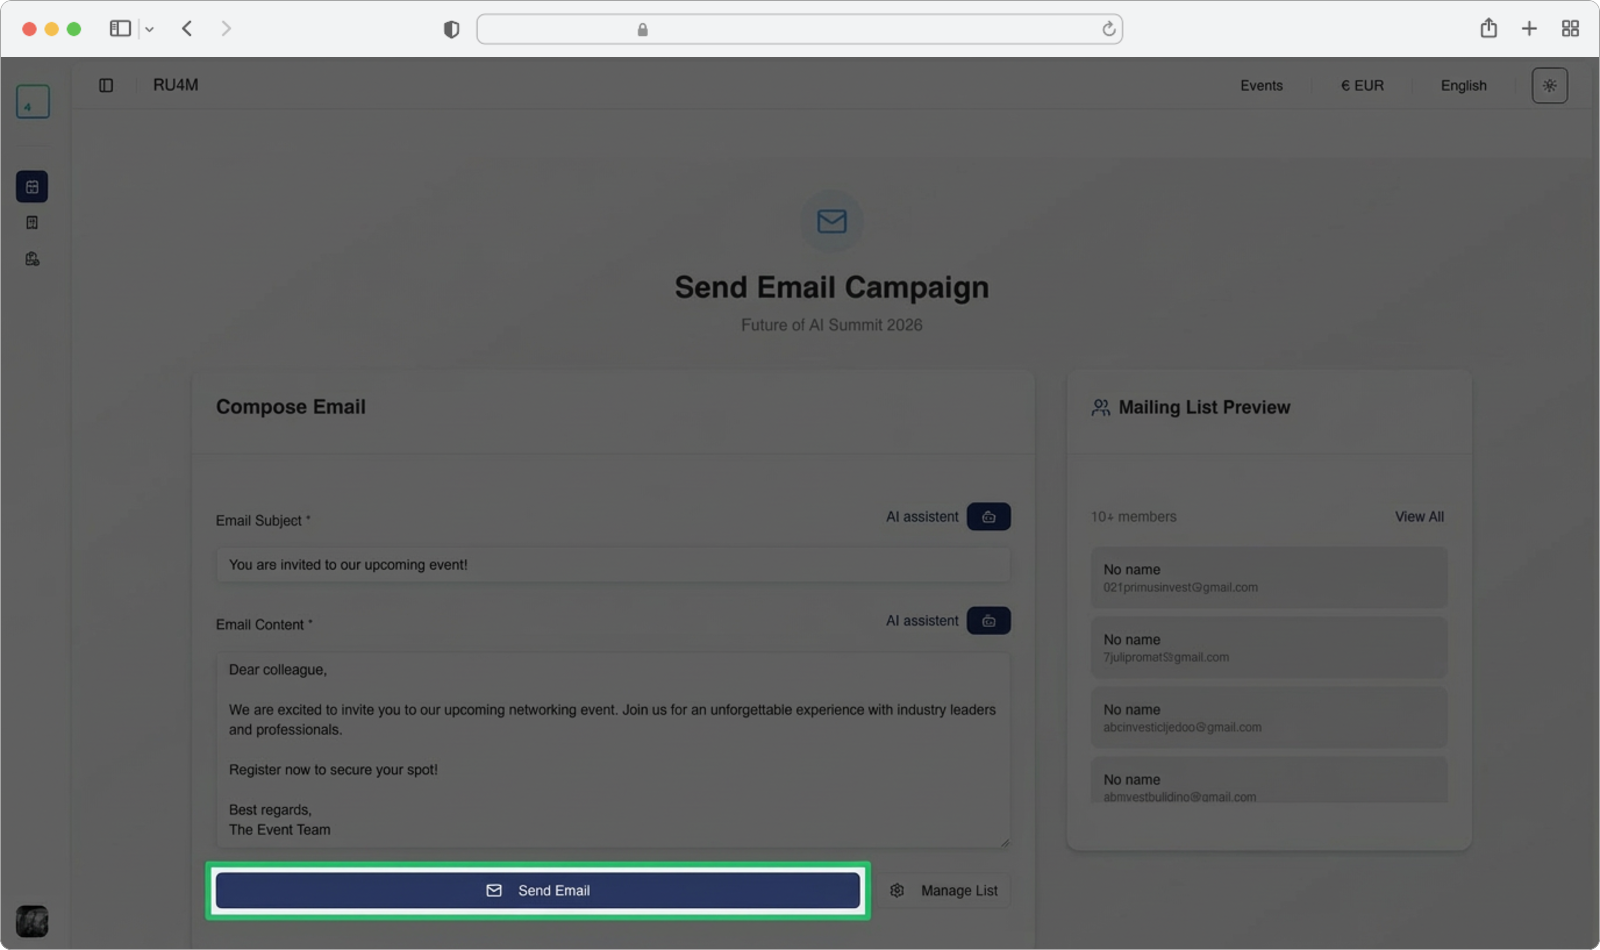
Back on the "Send Email Campaign" page, you should now see your email subject and content filled in on the left side, and your mailing list contacts displayed on the right side under "Mailing List Preview".
Review everything one last time to make sure:
- The email subject is correct
- The email content is complete and accurate
- The mailing list contains all the people you want to reach
When you are satisfied, click the "Send Email" button at the bottom of the Compose Email section. This button is now active (no longer grayed out) because you have added members to your list.
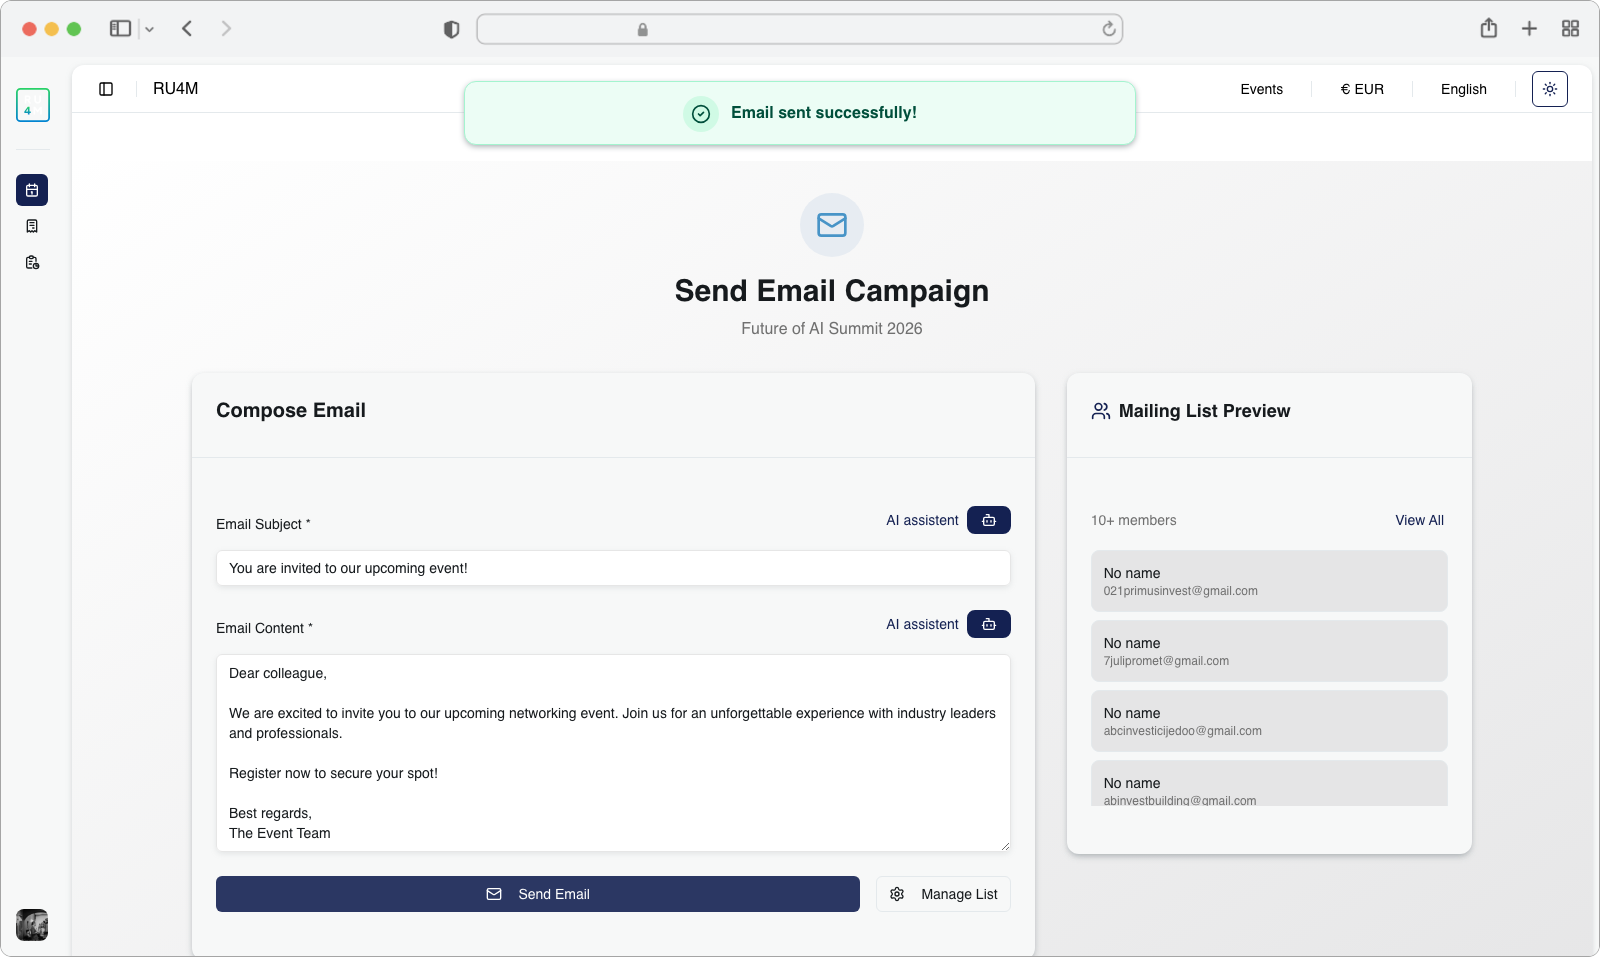
Confirmation
After the campaign is sent, you will see a success message at the top of the screen confirming that your email campaign has been delivered. You will then be automatically redirected to the event page for the event you just sent the campaign for.
What happens next?
Your emails are now being delivered to all the contacts on your mailing list. You can track how your campaign is performing (who opened it, who clicked links, etc.) using the Email Campaign Analytics feature, which is explained in the next section.